SharePoint blog: How to set it up for the intranet
A corporate blog combines journalistic objectivity with the emotions of a personal diary.
Here, a company can build a community around its values or offer its departments a space where they can communicate with the public without background noise.

What you will find in this article
Why start a corporate blog on your intranet
Have you ever been walking down the streets of a city and suddenly been drawn to a glittering storefront full of goodies and little treats?
Your eyes are browsing shapes and colors, and you are already thinking about how that pastry will melt in your mouth or how comfortable those shoes will be for going to the office.
Perhaps, in the end, you will enter and leave with extra weight to carry around.
A blog is a lot like a storefront.
Except in place of clothes, sweets, perfumes, and various items it offers information.
But why would it matter to a company that already has an intranet to communicate with its people?
We could write a whole article just of reasons, but these are the main ones:
- It brings order to clutter.
A corporate blog is a meticulous newsagent.
It collects news and articles, divides them by category, and displays them to the public with the clear intention of catching their eyes and interest.
- It selects the topics to be displayed.
Unlike a common news space, a corporate blog does not allow all recent information to be found within it. It selects.
That way, the HR department can present new welfare conventions without being interrupted by the latest IT tutorials.
- It is a powerful narrative tool.
A blog lays bare the latest updates, but it also tells stories and happenings in the corporate universe.
Think articles-interviews or even more original texts such as colleague's recipes or tips on how to take care of one's physical and mental health in the office and remotely.
This content connects to the values on which the organization is founded, showing how they can interweave with the lives of its people.
If we've convinced you so far about the varied usefulness of an internal blog, let's see what steps you need to follow to achieve it with SharePoint Online.
What is intranet.ai?
intranet.ai is the ready-to-use corporate intranet, designed to reduce costs and implementation times, thus creating a collaborative and modern digital work environment:
- Initial price of 3,650 €/year for a complete intranet
- 50+ applications, including advanced search, document management system, push notifications via Teams, personal profile, and FAQ pages
- 100% integrated with SharePoint Online and Microsoft 365
The 4 steps to create a corporate blog with SharePoint Online
Let's make a due introduction: to build a corporate blog with SharePoint there is the Microsoft method. Then there is ours.
Recognizing the genius behind tools like Word, Teams, Excel and countless others, however, our experience has led us to come up with an alternative way to approach the matter.
Why?
Because we breathe SharePoint. We put our hands and heads into it every day to design, implement, manage intranets and more.
Hence, our developers noticed a significant flaw in creating a blog using the Microsoft method (which you can learn more about in this official article).
The problem is the difficulty the platform has in handling the exponential growth of publications that converge in web parts used for blogs.
Without a proper setup of the platform's roll-up mechanism, it is indeed very likely that some content will be lost along the way.
So, below we propose the steps we have devised to solve this problem.
Our method is alternative, but no more complicated than the traditional one.
Let's see it step by step.
Step 1: Create metadata to tag news items
First, you must go to the Term store, or admin site, by clicking on:
- Settings (top-right scroll wheel).
- Site Information.

- View all site settings.
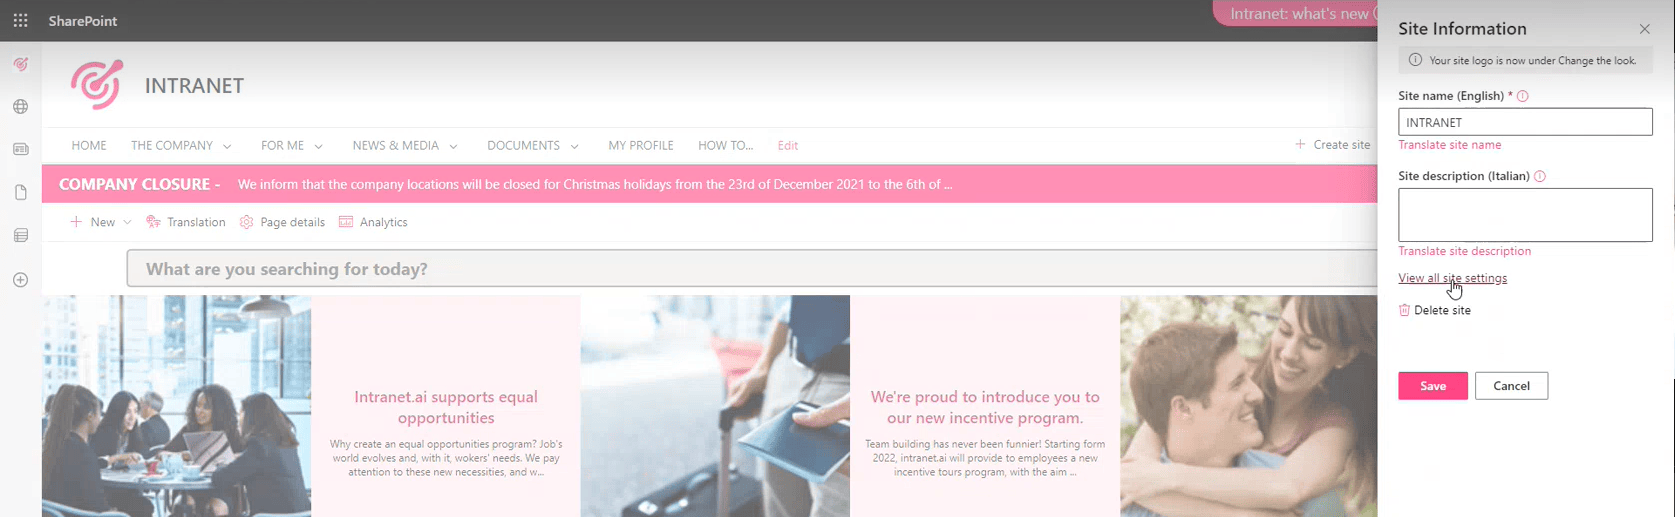
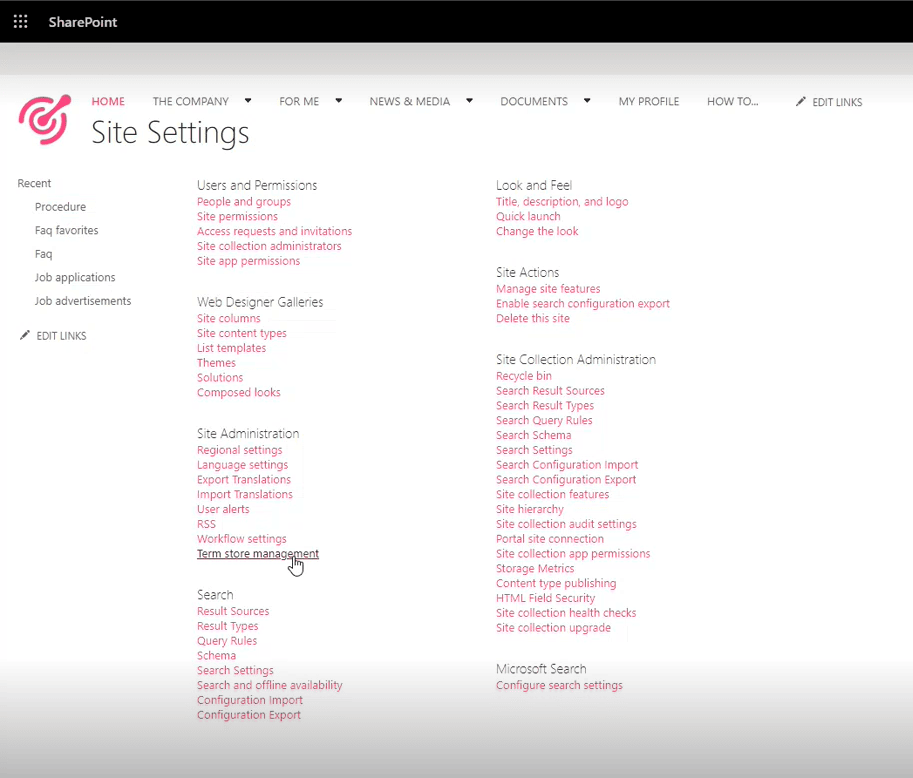
- Term store management.
Remember that to create new metadata in this area, you must have high-level permissions and log in as admin*.
*In general, these permissions are held by IT or project managers.
Once you are logged in as admin or administrator, you can move on to creating metadata.
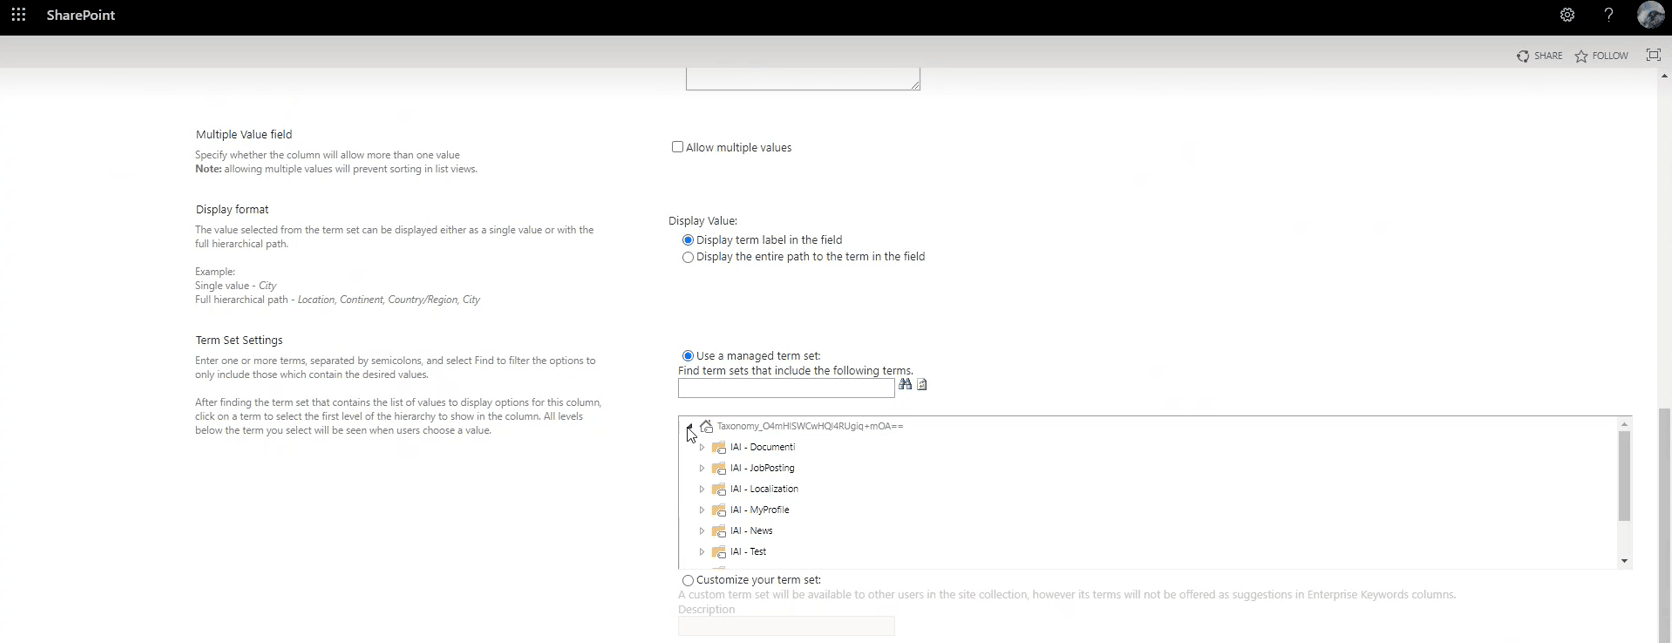
SharePoint metadata can be organized on multiple levels.
However, the advice is not to go beyond the third one to avoid putting a strain on the platform.
And also because you never need a fourth.
The first level of metadata refers to the type of content, such as news or documents.
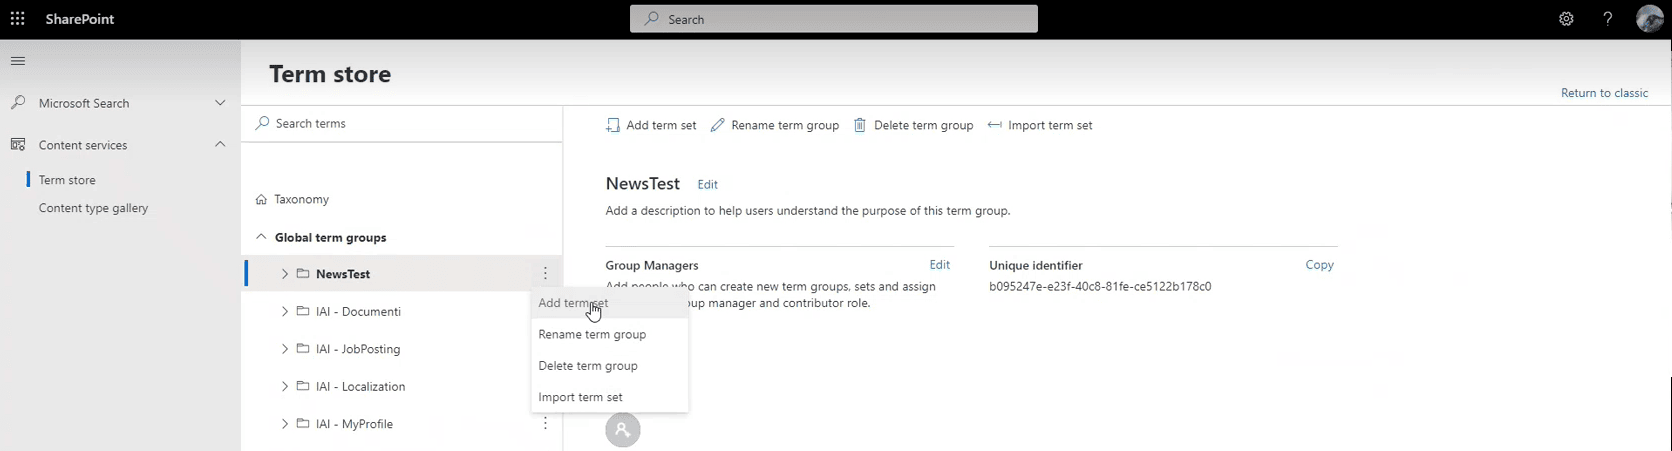
To create a first-level metadata, just click on the side of "Taxonomy" and select "Add term group".
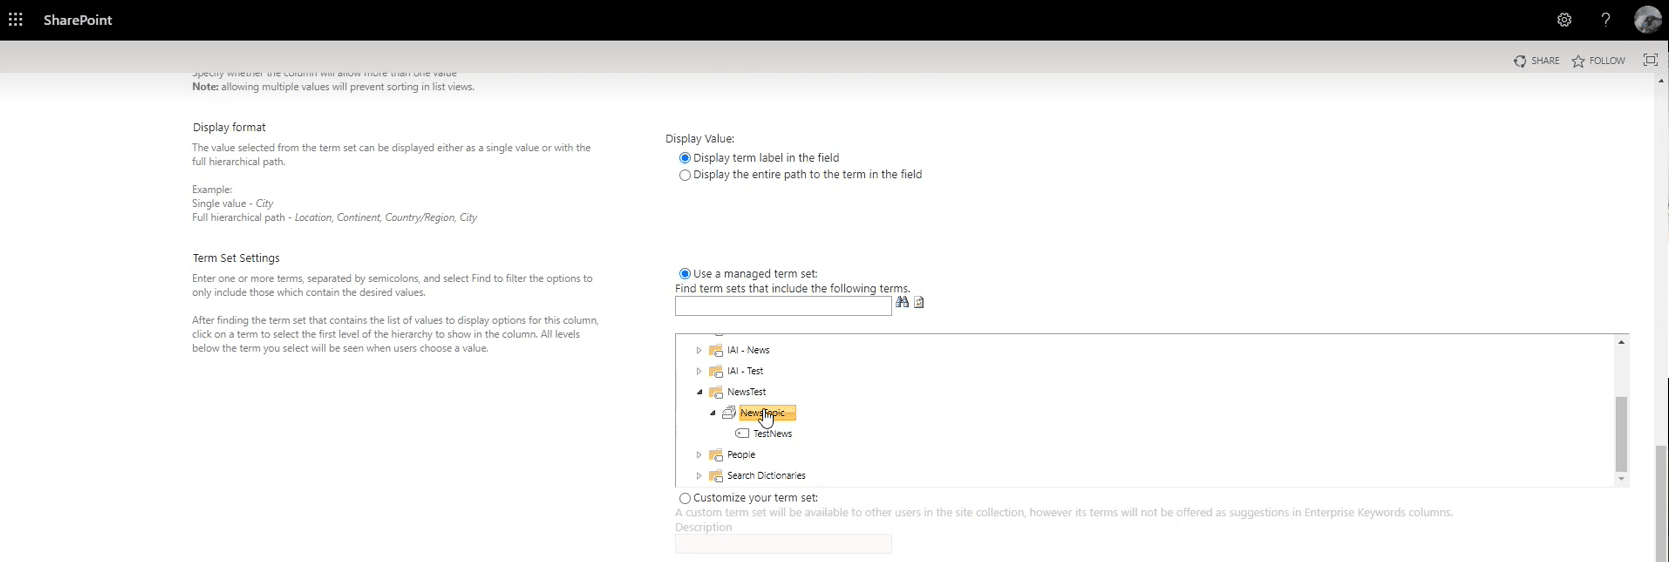
The second level refers to the type of tags to be assigned to content pages.
An example for news would be the type called "topic" (news topic).
To create it, click on the side of the first-level metadata and select "Add term set”.
Finally, the third level refers to each category tag, as it might be in the case of "press release" or "corporate" news.
To create these tags, click on the side of the second-level metadata we have called "topic" and select "Add term”.
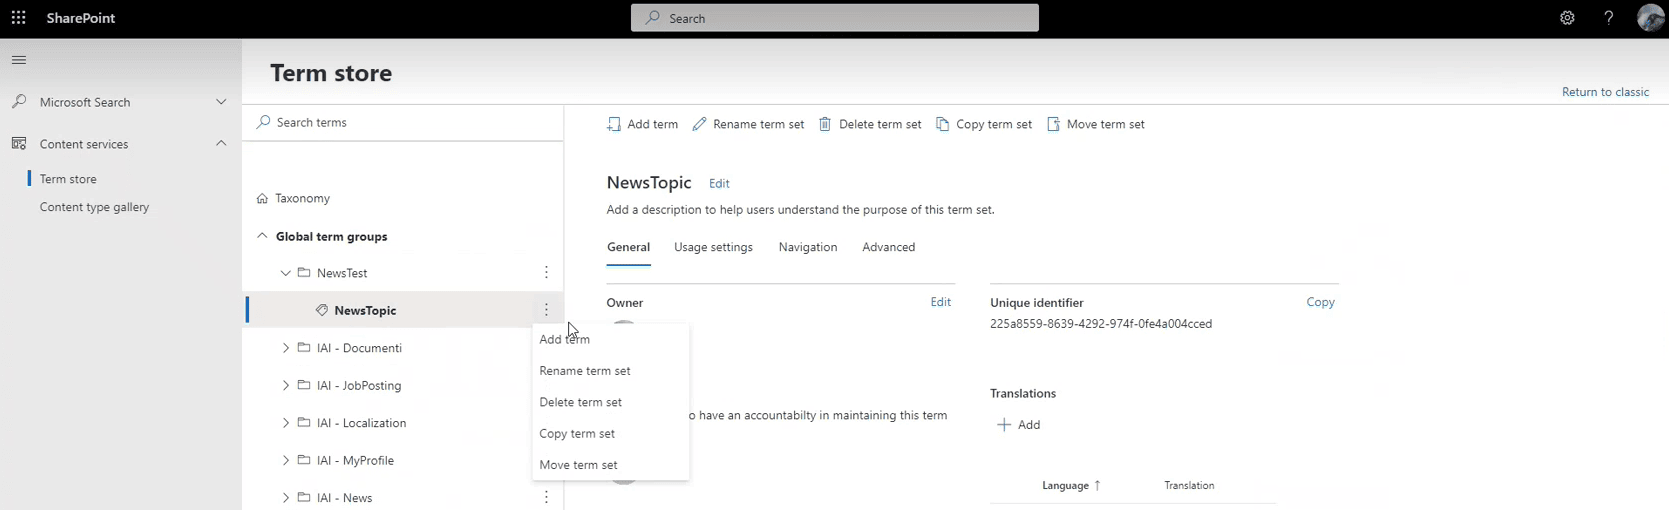
There you have created the metadata layers needed to allow the blog sections to filter your articles.
Step 2: Create the column for news category tags
Creating a column for your new tags is useful in order to be able to categorize already published news posts without having to edit them individually.
To do this:
- Click on "Add column”.
- Select "More", which will take you to the column configuration screen.
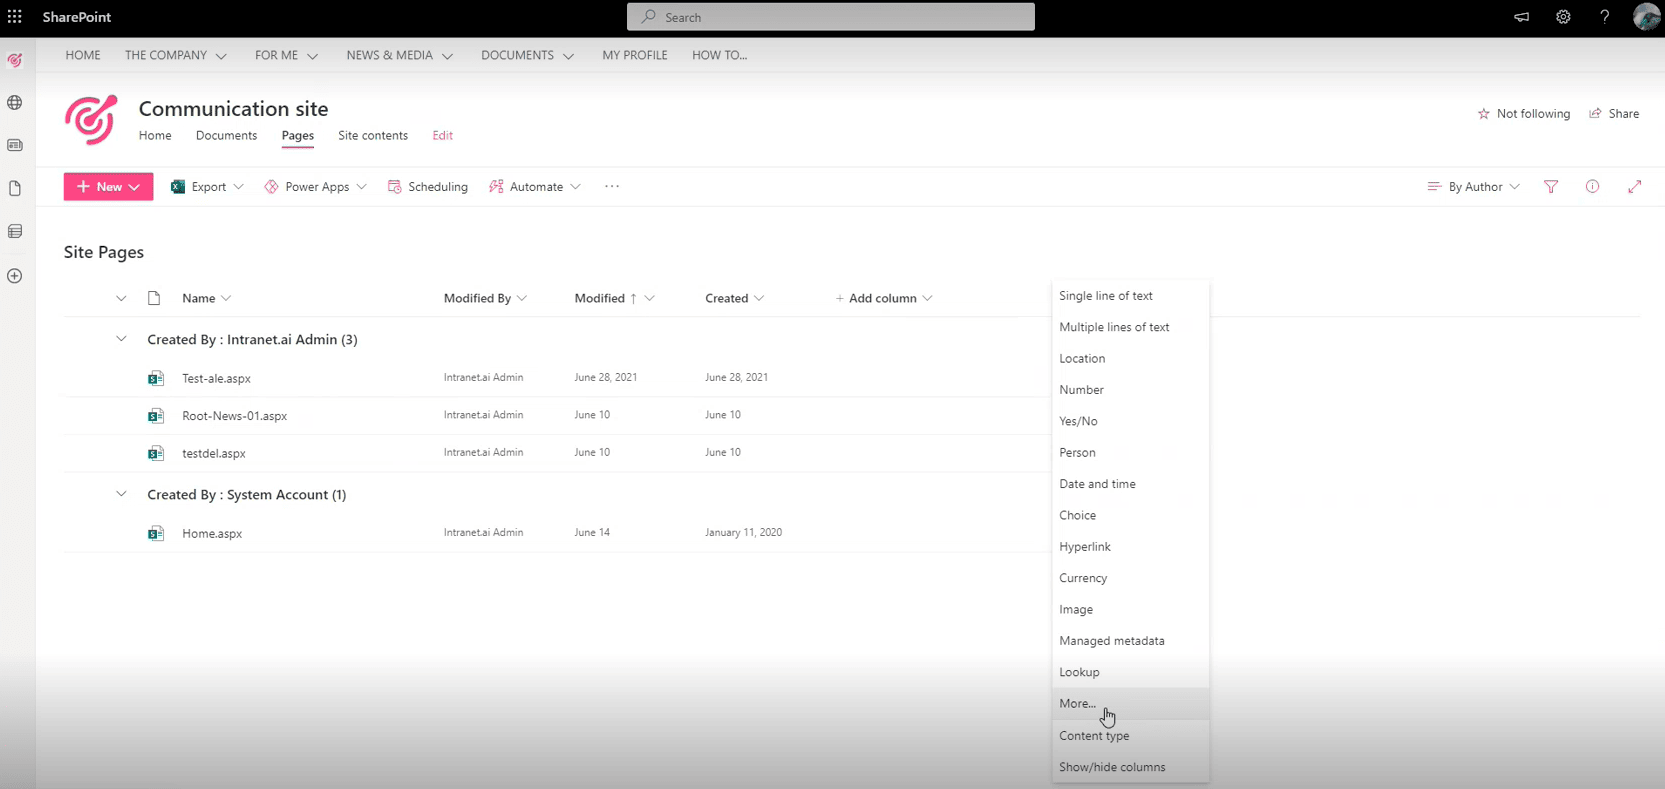
- Assign a name to the column.
- Click on "Managed metadata" as the type of information to be displayed.
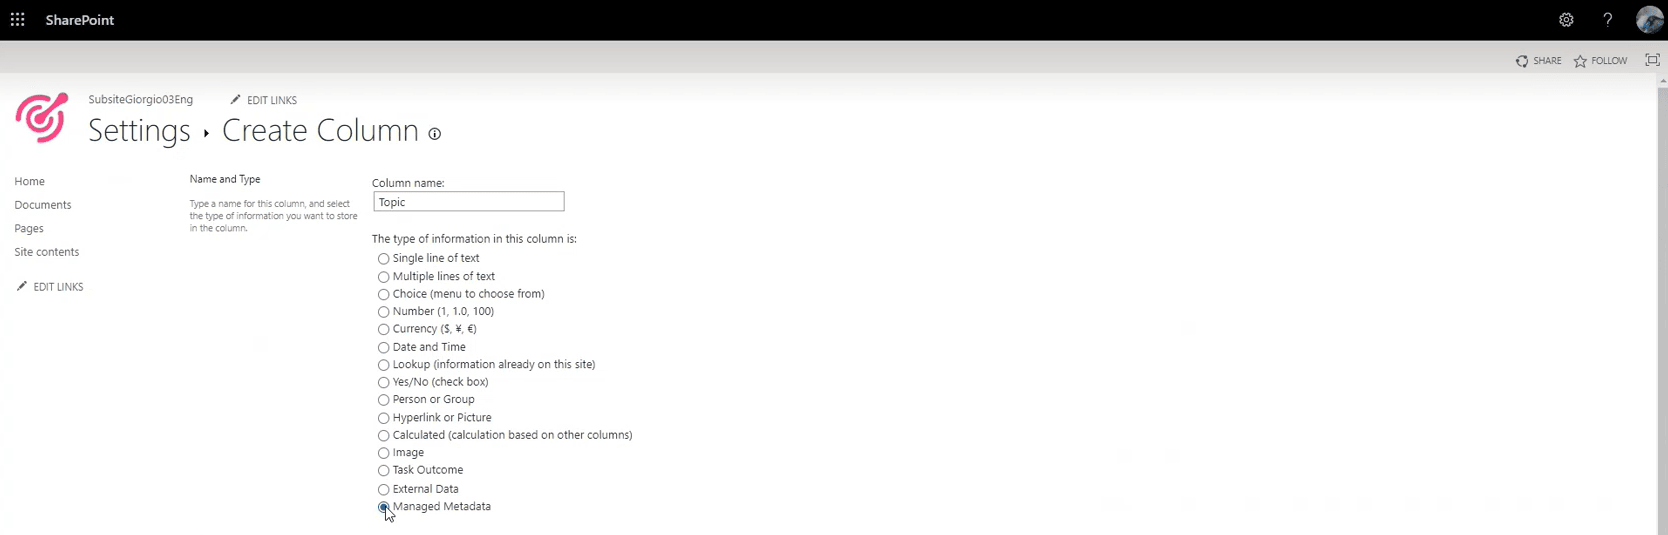
- Decide whether to make tagging the column mandatory or not, and whether to allow one or more tags to be added per news post (useful if the news is both corporate and event-related).
- Configure the column's Term set by selecting the second "topic" metadata level.