

Lists are one of the main features of SharePoint Online, as they allow the platform to manage a significant amount of data in an intelligent, secure, and scalable way.
In this article, we will explore what SharePoint lists are, what advantages they offer for managing content and information within a company, and how to create a SharePoint list, step by step.
We will also look at the differences with Microsoft Lists and why sometimes it is better to use a SharePoint list instead of a Microsoft Excel sheet.
What you will find in this article
SharePoint Lists: What are they?
SharePoint lists are tabular content areas, similar to Excel sheets, where users can define the structure of the entered data to view and store it efficiently. This is made possible thanks to the rich variety of features for formatting and accessing information.
These are collections that play a crucial role within SharePoint Online, enabling intelligent management of content such as:
-
Contacts
-
Documents
-
Internal requests
-
Personal or team tasks
-
Etc.
Regardless of the type of data they store, lists are used as a starting point in the digitalization of internal processes through SharePoint Online sites, including team-specific collaboration sites and communication sites like the company intranet.
This task is successfully achieved also through the deep integration of SharePoint lists with the tools of the Microsoft Power Platform (Power Apps, Power Automate, and Power BI, to name the main ones).
When a user creates a new permission request within a SharePoint list, it is possible to integrate a custom Power Automate flow to manage the approval process and correctly store the completed request, automatically updating the list’s information.
This is just one example, but it should clarify the potential of SharePoint lists in managing information and increasing a company’s daily productivity.
See intranet.ai in action
A ready-to-use intranet on SharePoint Online, live in days. Book a free demo with our team.
Book a demoHow to create a list on SharePoint Online, from scratch
SharePoint Lists: What templates are available?
SharePoint Online offers a wide variety of ready-to-use templates to speed up the creation of a list and start populating it with data, thanks to formatting suitable for the tasks to be performed (project management, specific requests, events, and more).
SharePoint templates allow you to create a pre-configured list in terms of columns, color schemes, and information structure. Of course, each item in the list can be modified to adapt the template to your needs, but often these templates are perfect for the tasks they are assigned to.
Among the most commonly used templates to create a list in SharePoint Online, we find the following.
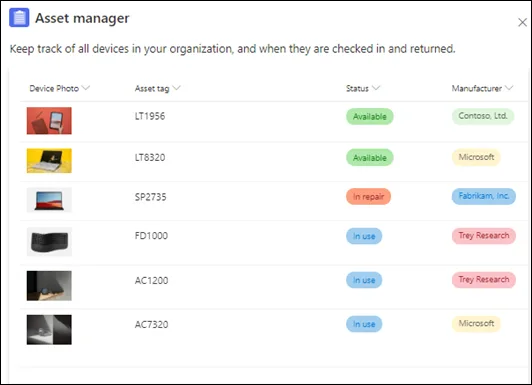
Asset manager
It allows you to keep track of physical assets used by the team. Among the default values in the columns of the template, we find the asset identification number, the status (available, reserved, in use, under repair, or retired), the type of resource, and the current owner.
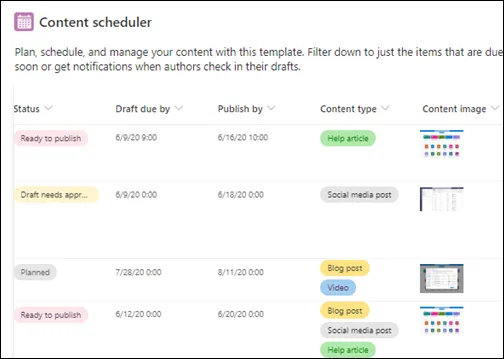
Content scheduler
Allows you to plan and manage the content strategy. Among the values that appear by default in the columns of the template, we find the content description, author, status (in approval, ready for publication, or published), expected publication date, content type, and any attachments.
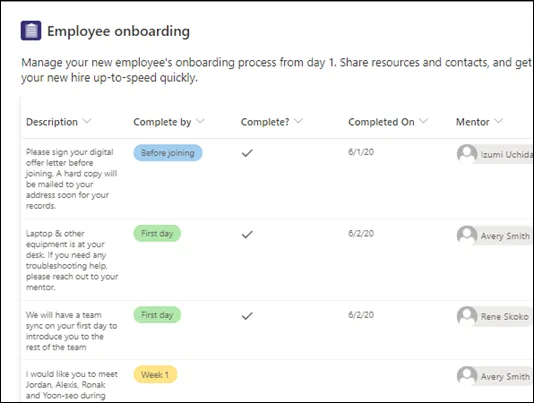
Employee onboarding
It allows you to manage the onboarding process for new hires, guiding them through useful contacts and resources. Among the values that appear by default in the model’s columns, you will find the task name to be completed, task description, due date for task completion, reference contact, and links/resources to be used to complete the task.
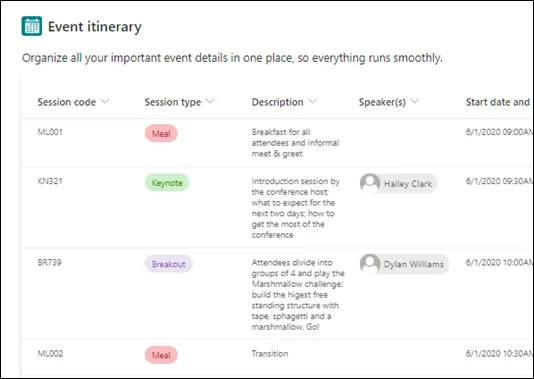
Event itinerary
Allows you to organize all the important details of a business event. The default values that appear in the template columns include event name, event type, start and end date, duration, location, and organizer notes.
Issue tracker
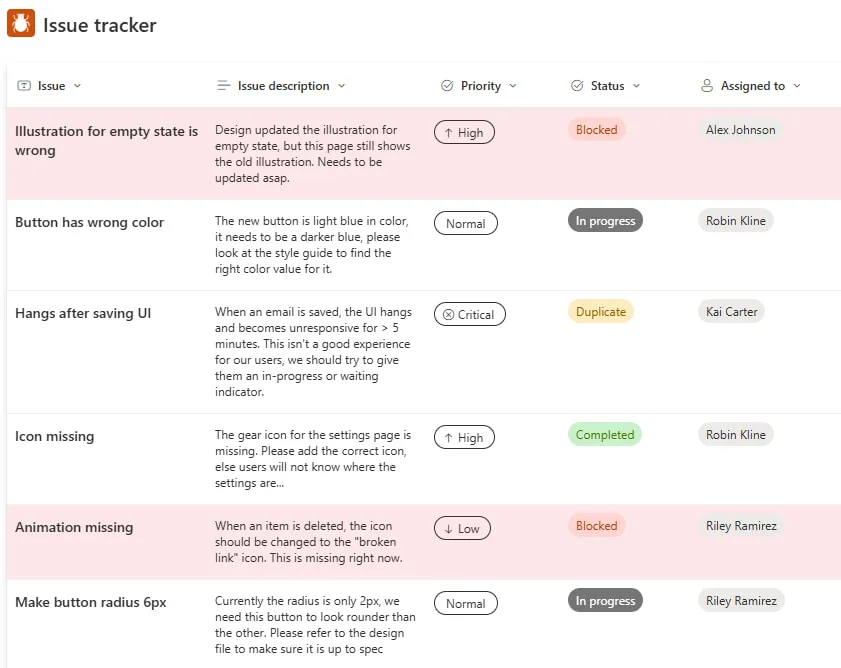
It allows tracking, managing, and resolving all issues identified by a team. Among the values that appear by default in the columns of the template, we find issue name, priority (critical, high, normal, or low), status (blocked, in progress, completed, new, etc.), person or group assigned to the issue, reporting date, origin of the issue, and associated files.
Recruitment tracker
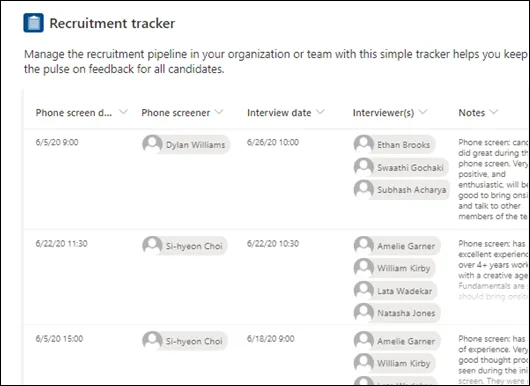
It allows you to manage the recruitment pipeline within the organization or team, tracking candidate feedback. Some of the default values that appear in the model columns include candidate name, the position the application is for, the status of the hiring process, recruiters, application submission date, interview date, notes, and documents such as shared CVs.
Travel requests
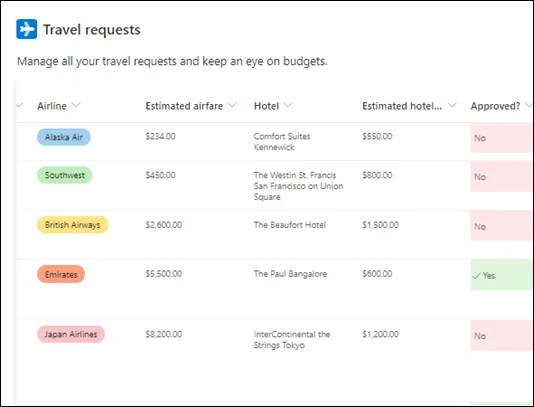
Allows you to manage travel requests, monitoring the available budget. Among the values that appear by default in the columns of the template, you will find trip title, reason, requester, destination, start and end dates, transportation, accommodations, estimated rates, and approval status.
How to create a list in SharePoint: a practical example
From the home page of a SharePoint site, such as the company intranet, we find the “New” command. By clicking on it and then selecting “List”, the list creation process begins.
But be careful: only users with editing permissions or full control have the ability to create new items within a SharePoint Online site, including lists.
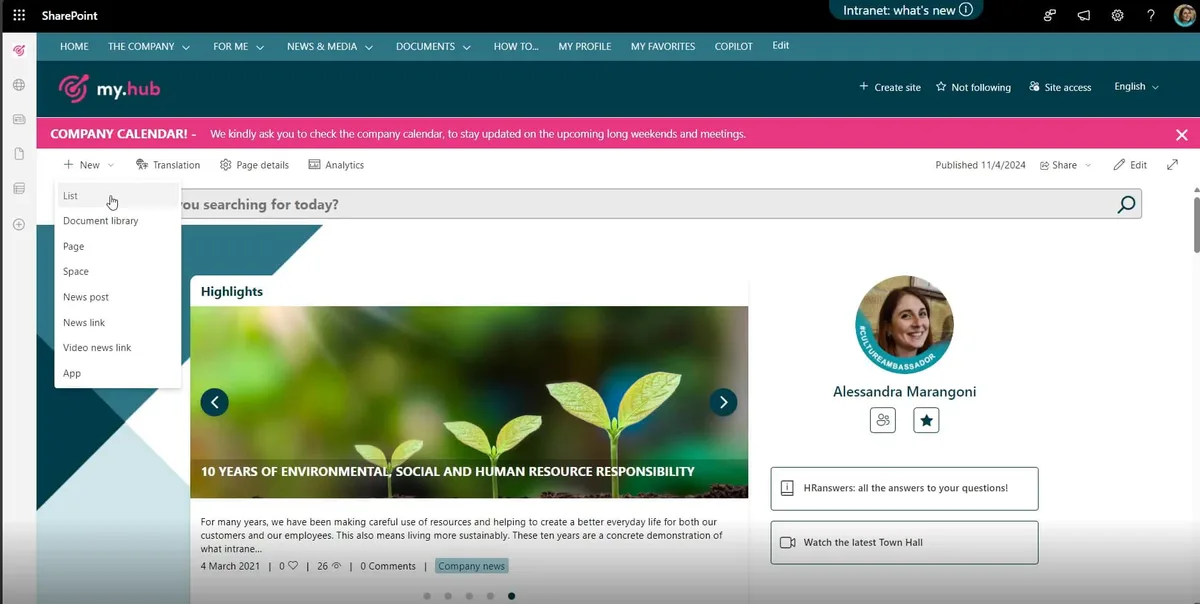
Command “New” + “List” from the SharePoint intranet homepage
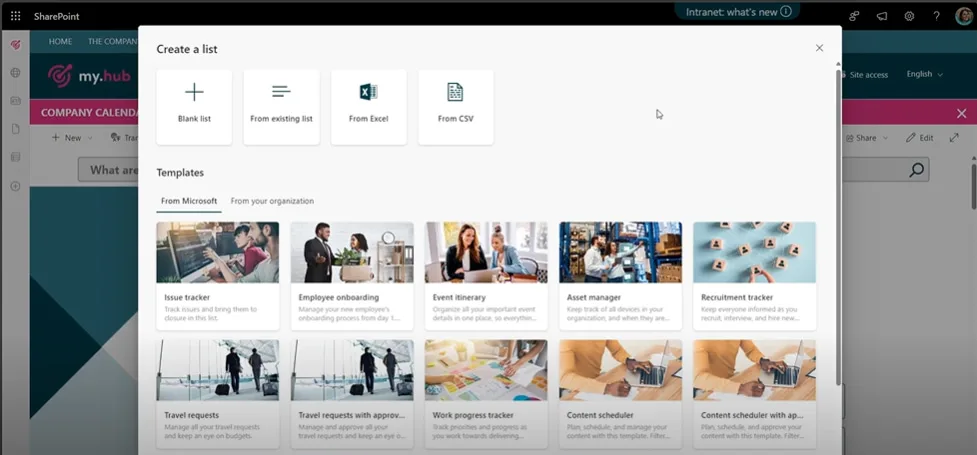
SharePoint will then show the different options for creating a list. Three, specifically:
-
Choose to create the new list from scratch, with the “Blank list” template.
-
Use a pre-configured template, based on the activity to be carried out.
-
Create a list from an existing SharePoint list, an Excel sheet, or a .CSV file.
Regarding templates, it’s useful to know that there is a feature to create custom templates to share with colleagues under the “From your organization” section.
However, this is not an intuitive process, as custom templates for SharePoint lists can only be uploaded by an administrator using the following PowerShell cmdlets:
-
Get-SPOSiteScriptFromList, to extract the site script from any list.
-
Add-SPOSiteScript and Add-SPOListDesign, to add the custom template.
-
Grant-SPOSiteDesignRights (optional) to determine who can see the template.
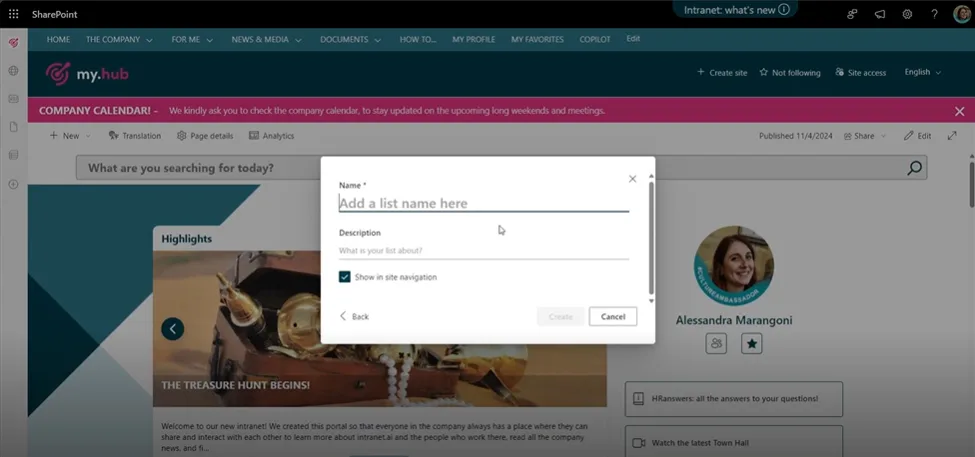
Once the most suitable option for creating the list has been chosen, SharePoint asks for a name for the new item (required), to write a description (optional), and to indicate whether the list should be shown in the site’s navigation or not (by enabling/disabling the appropriate flag). If the list is to be shown in navigation, a link is inserted into the site’s sidebar (if present).
Starting from a blank template, a new list is created with a single field “Title”, which can be modified to start structuring the data. It is necessary to think about the purpose of the list. For example, if you wanted to create a customer database, the “Title” column could be renamed to “Customer name”.
Then, you can add as many columns as needed to manage the information.
To add a new column, simply select the “Add column” command and choose the type of data to be inserted. Among the supported types, you can find columns to store data in the following formats:
-
Text
-
Numeric
-
Multimedia (images)
-
Personal contacts
-
Quick link
-
“Choice”
-
“Date and time”
-
“Yes/No”
-
“Currency”
-
“Location”
-
Etc.
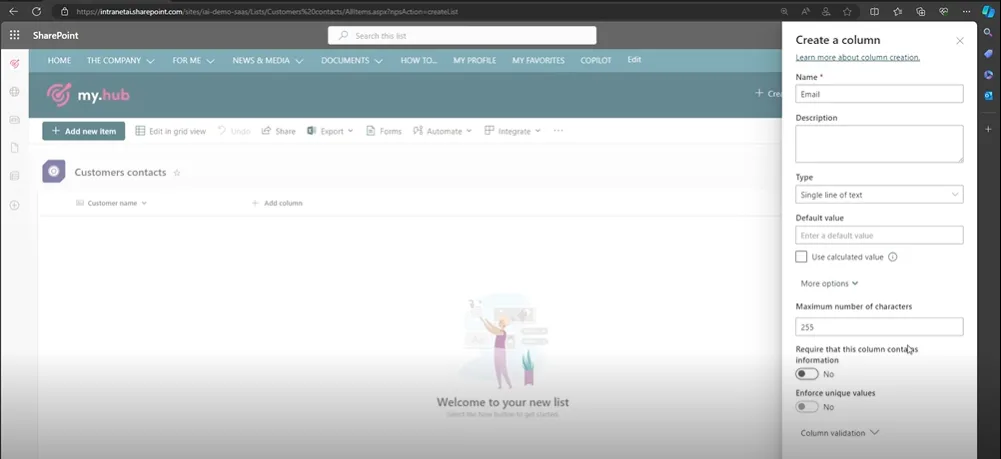
Continuing with the customer database example, it might be useful to add a text-type column to store the email address of each contact. Once the column type (“Text”) is selected, the configuration pane opens where you can:
-
Specify the title and description of the column.
-
Define the maximum number of characters for each value entered in the column.
-
Make the field mandatory for each new contact.
-
Ensure unique values, to avoid duplicates in the same column.
After configuring, simply click “Save” and the column will immediately appear in the list.
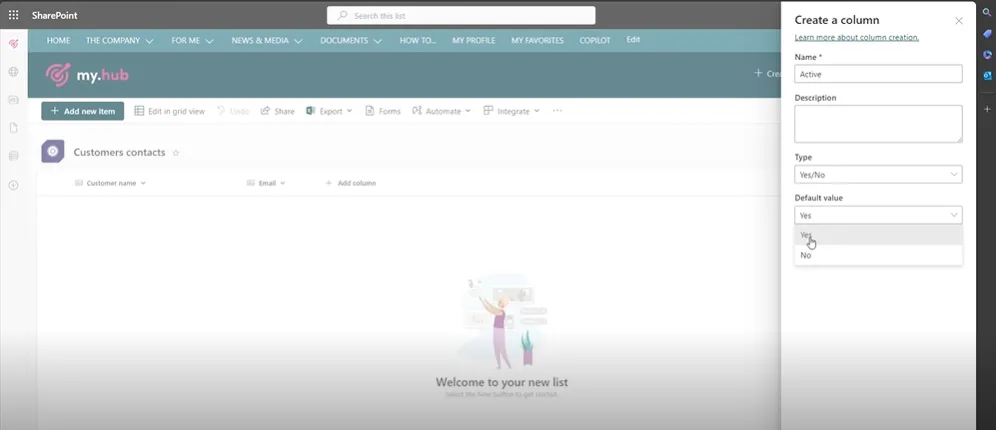
A second column that should not be missing in a contact list is the one related to status, to highlight whether the contact is active or not.
You should therefore add a new “Yes/No” column.
For this type, it is important to carefully choose the default value, which is the value that will be automatically assigned to each new item in the list. For example, by choosing “Yes” as the default value, the contact list will automatically indicate that each new contact is to be considered an active customer.
An additional, important column for our example concerns the last contact date with customers. In this case, the “Date and time” type is useful. A recommendation is to enable the “Friendly format” option to display the date (with any time) in an accessible and easy-to-read format.
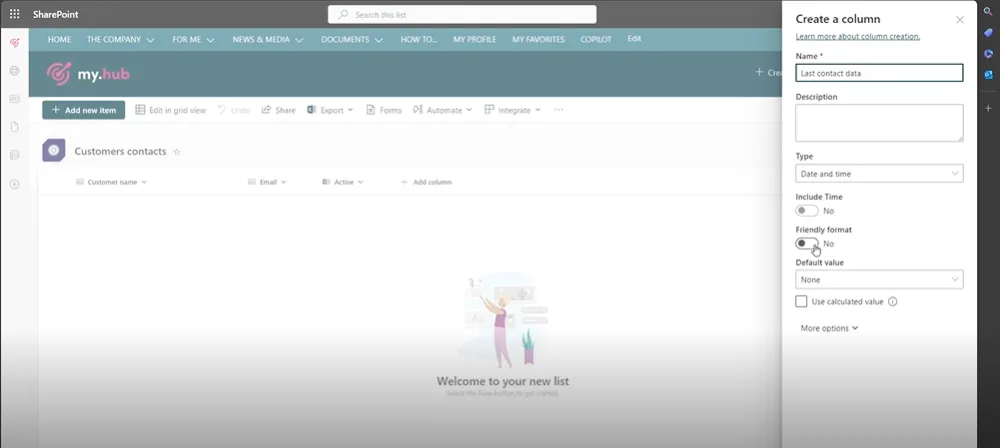
After completing the data structure, it’s time to populate the list with “Add new item”.
This command opens a panel to fill in the information related to the new list item, displaying on a single screen the custom fields entered by the user.
In our example, the panel asks for information regarding the customer name, email, status, and last contact date. A default area is also available to insert any attachments.
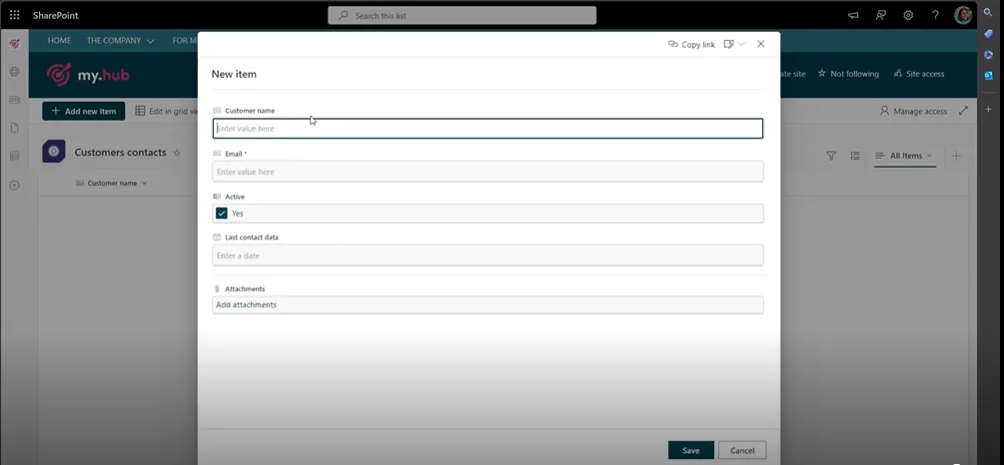
Unlike document libraries, where files are inserted as values in one or more columns, SharePoint Online lists allow you to attach content only as detail items for the column values.
You need to click on a list item to view all the information related to it, including any attachments. The detail window also allows you to modify the information of individual items and leave comments (this action is only possible if enabled).
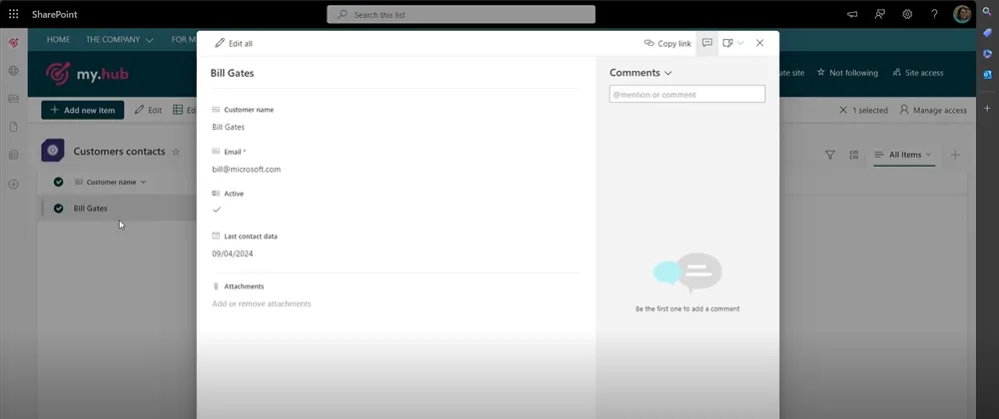
Finally, a very useful feature is “Edit in grid view”.
This command makes using SharePoint lists very similar to an Excel sheet, allowing you to interact with individual cells in a column to modify the values, without having to open the detail window of an item to update its information.
To simplify, here is a table summarizing the steps described so far to create a list on SharePoint Online.
How to create a list on SharePoint Online
Steps to create a SharePoint list Description
Use the “New” command From the home page of a SharePoint site, such as the intranet, click on the “New” command in the top left and then select “List”.
Select the template Choose whether to create the new list from a pre-configured Microsoft template, a custom template from your company, or a blank template. You can also use an existing SharePoint list, an Excel sheet, or a .CSV file to create the new list.
Configure the new list Give the list a name, write a description (optional), and choose whether to add a quick link to the list in the SharePoint site navigation.
Modify the “Title” column The “Title” column is the only column present if you choose to create a list from scratch. Modify this column according to the purpose of the list. For example, assign the name “Customer name” if the list is meant to manage customer profiles.
Add and format new columns Add as many columns as needed to structure the data of the new list. SharePoint offers different column types to store data in text, numeric, etc. format. Configure the added columns to simplify the display and management of information. For example, pay attention to the default value in the “Yes/No” column or enable the “Friendly format” for the “Date and time” column.
Enter new data into the list Use the “Add new item” command to add a new item to the list. Enter the required information in the custom fields for each new item.
Access item details Click on an item in the list to view and edit the detailed information, including any attachments. To avoid opening this window to edit an item’s information, you can use the “Edit in grid view” command.
SharePoint Lists vs Microsoft Lists: main differences
With the SharePoint Modern Experience, introduced by Microsoft a few years ago, users gained the ability to use Microsoft Lists for free: one of the latest applications in Microsoft 365, designed to simplify the management of business information.
Introduction to Microsoft Lists
Microsoft Lists is defined by the parent company as a “smart app” for tracking data in Microsoft 365, with features for collaboration “with anyone, anywhere”.
However, Microsoft Lists’ features have recently been synchronized with those of SharePoint Online lists, meaning that now both systems offer a virtually identical experience for managing information.
Although we can still find some substantial differences.
First, Microsoft Lists integrates with Microsoft Teams.
This integration allows users to view and edit the content of lists created in Microsoft Lists directly within a Teams channel. To do this, simply add the “Lists” tab to the top command bar of a channel, which will allow users with the appropriate permissions to create a new list or view an existing one.
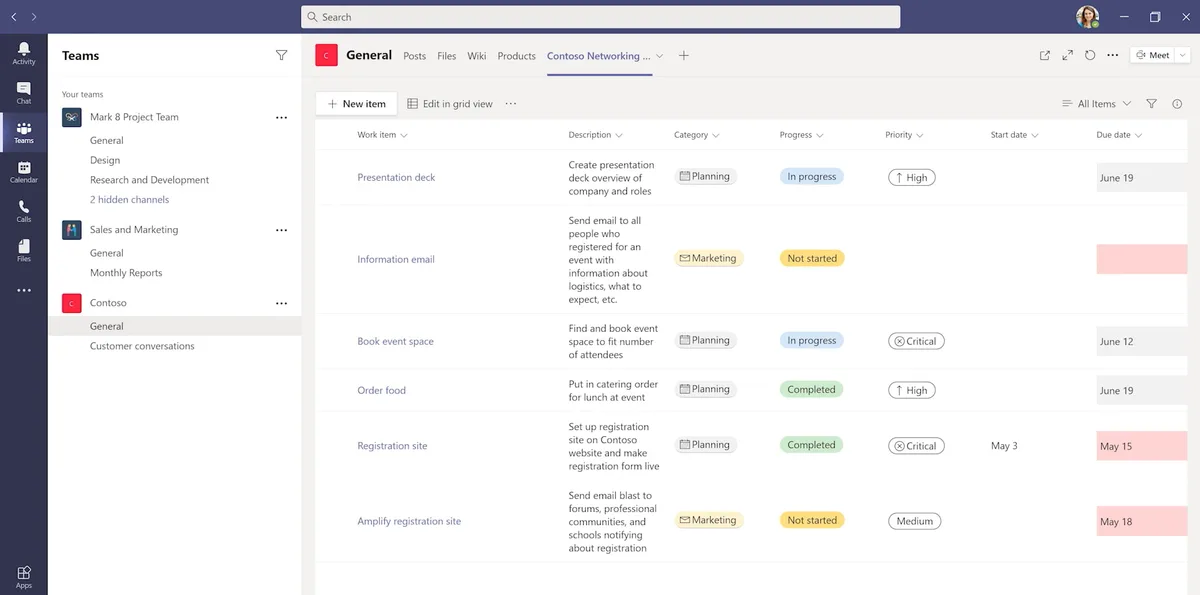
The second difference concerns the location where the lists are stored.
Lists created with SharePoint can only be found within a site, which is also the only way to access and view them; Microsoft Lists, on the other hand, are stored within personal SharePoint sites or dedicated storage spaces, such as OneDrive, and can be accessed, modified, and managed more independently within the Microsoft 365 environment.
Therefore, Microsoft Lists does not replace SharePoint lists, but enhances their capabilities: the data is stored in SharePoint Online, but made accessible from multiple entry points in Microsoft 365.
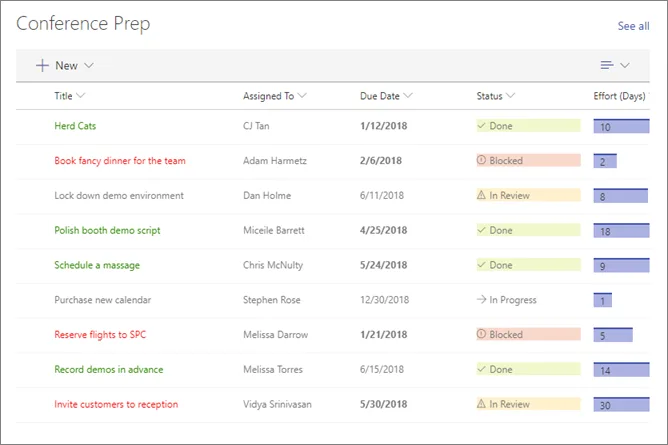
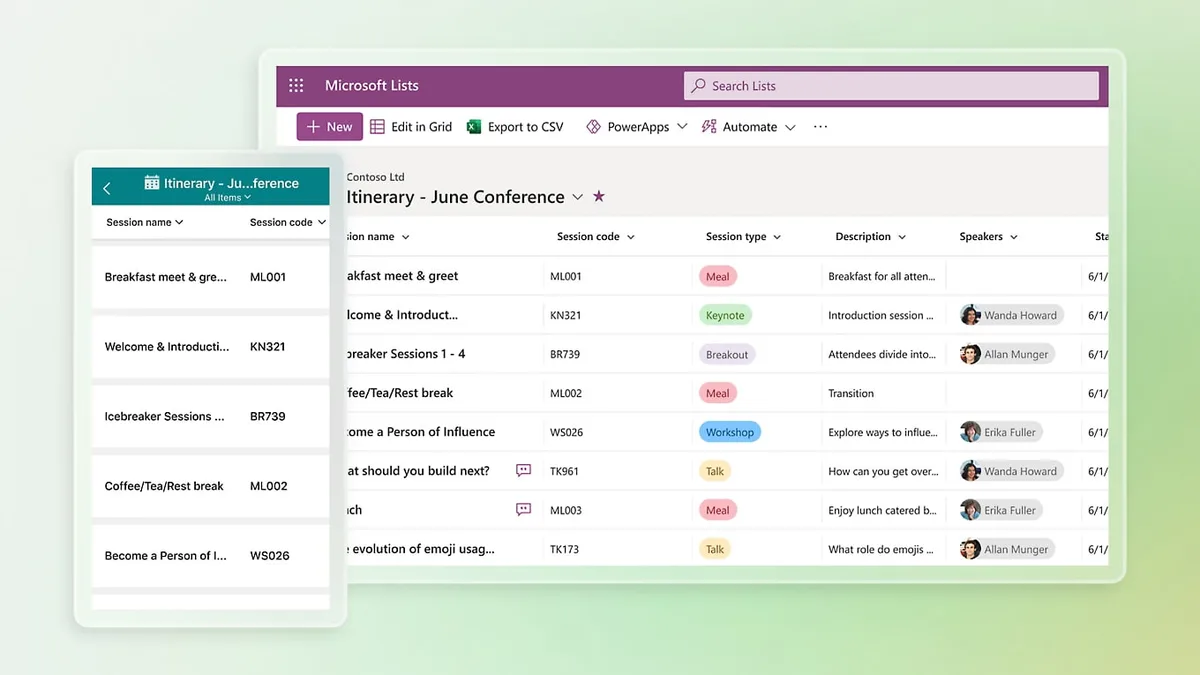
Third and final important difference: Microsoft Lists also exists as a standalone application.
It is not just an extension or an inherent feature like SharePoint lists, but a separate platform available as a web app and mobile app.
Are SharePoint lists better than Excel sheets?
SharePoint Online lists have a mechanism very similar to Excel sheets for data formatting. Of course, lists do not support the use of formulas to combine the values they hold, but they are just as good as Excel sheets when it comes to managing information. In fact, they might even offer a few advantages. Here are a couple of them.
-
Single source of information. Unlike Microsoft Excel spreadsheets, which can cause version control issues when multiple users are involved, SharePoint lists are online and provide a centralized platform where only one version of the data exists.
-
More control. With SharePoint Online lists, you can assign specific permissions to individual items. Excel, on the other hand, does not offer such granular control over the information in a spreadsheet. Users can only decide whether to allow access to the entire Excel file or not.
-
Data integrity. The combination of permissions, forms, and information validation helps maintain data integrity in SharePoint lists. The system also provides audit trails and version history, which further improve the accuracy of the data compared to Excel.