

SharePoint corporate newsletter: How to write it in 9 steps
The corporate newsletter is the most beloved content category on the intranet. Why?
Let's start with this question and work our way to how to write a newsletter with SharePoint, step by step.

What you will find in this article
Corporate newsletter: the most beloved on the intranet
Internal communication is a strategy and as such requires daily care like a houseplant.
The kind of ones that die from one extra drop of water or less, but essential to make our house a home.
Similarly, internal communication aims to make employees feel part of a community, reinforcing their trust and well-being within an organization.
To do this, however, it needs a well-thought-out plan of action, including appropriate distribution channels to tailor its messages to members of the company's diverse audience.
Starting with creating an intranet, the next step is to reach users with messages specifically designed for them.
In this context, the newsletter fits in with a starring role similar to Rossini's Figaro.
Indeed, like the factotum of Seville, it lends itself to handling all kinds of communication tasks without neglecting the personal angle.
From corporate news to an interview with an office colleague, news makes the intranet a pleasant reading routine to stay up-to-date and - why not? - have fun with witty and less formal content such as:
- quizzes;
- personal interviews;
- photography contests;
- cookbooks;
- physical and mental health tips;
- interoffice competitions;
- memes;
- etc.
These are just a few examples of excellent accompaniments to the usual updates on projects or services, helping to create an atmosphere that is as professional as it is homely.
Not surprisingly, the success of many intranets has depended largely on the quality of their newsletters.
What is intranet.ai?
intranet.ai is the ready-to-use corporate intranet, designed to reduce costs and implementation times, thus creating a collaborative and modern digital work environment:
- Initial price of 3,650 €/year for a complete intranet
- 50+ applications, including advanced search, document management system, push notifications via Teams, personal profile, and FAQ pages
- 100% integrated with SharePoint Online and Microsoft 365
The 9 steps to create a newsletter with SharePoint Online
Let's get to the articles in a newsletter.
These need to be well written and organized to keep the recipients' attention and hopefully provoke a reaction from them.
For this reason, we recommend using a tool such as SharePoint from Microsoft 365.
This tool allows you to create blog-style news categories and branded news templates to achieve a twofold result:
- Users will be able to easily find content and follow the news most relevant to them.
- Corporate editorial staff will be able to start from the templates to create customized models, so they can save on publishing time but not on content quality and consistency.
So let's see how to write a news story with SharePoint and reuse it as a template for subsequent corporate communications.
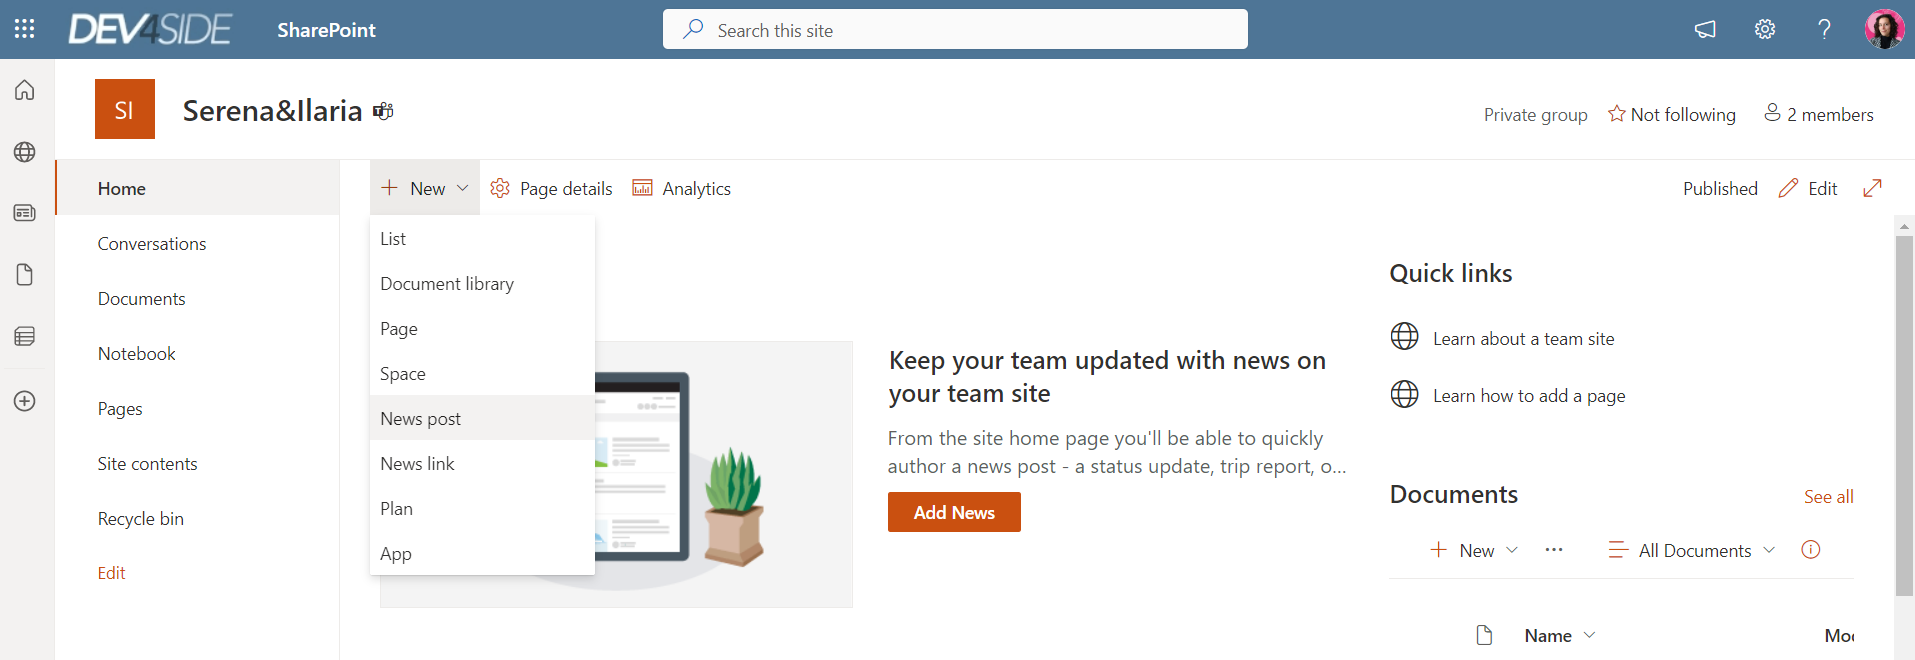
Step 1: The new news
From the SharePoint Online home page, click on "New" and select "News Post" from the menu.
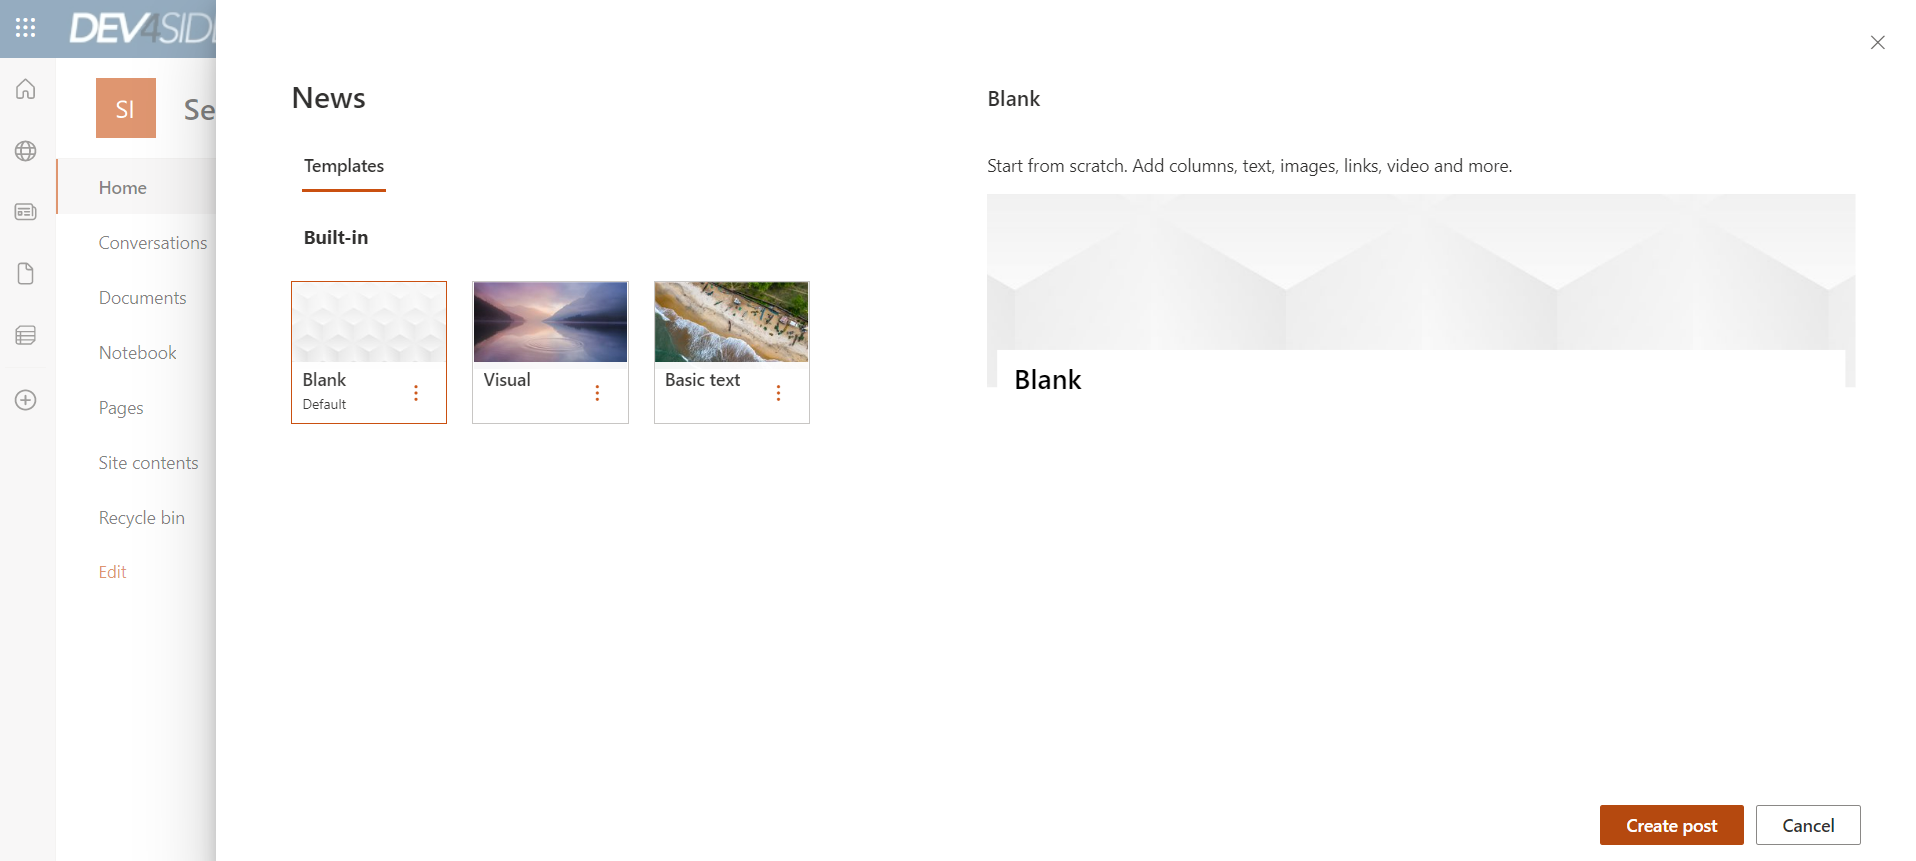
Step 2: Clean or default page?
Choose whether to create the content from scratch or with a SharePoint template.
Templates save time on color palettes, formatting and text layout.
But beware.
You can also use your own branded template to speed up publishing while maintaining a strong consistency with your brand's graphic identity.
In step 8, we will see how this is done.
Step 3: The Narrative Name
Consider the case where you have chosen to start from scratch to write your content.
The first thing to do is to give the news story a title.
Write one that is short, clear and simple (not Calvino's antilanguage, to be clear).
A good title exposes the topic of the entire article in concise, precise words.
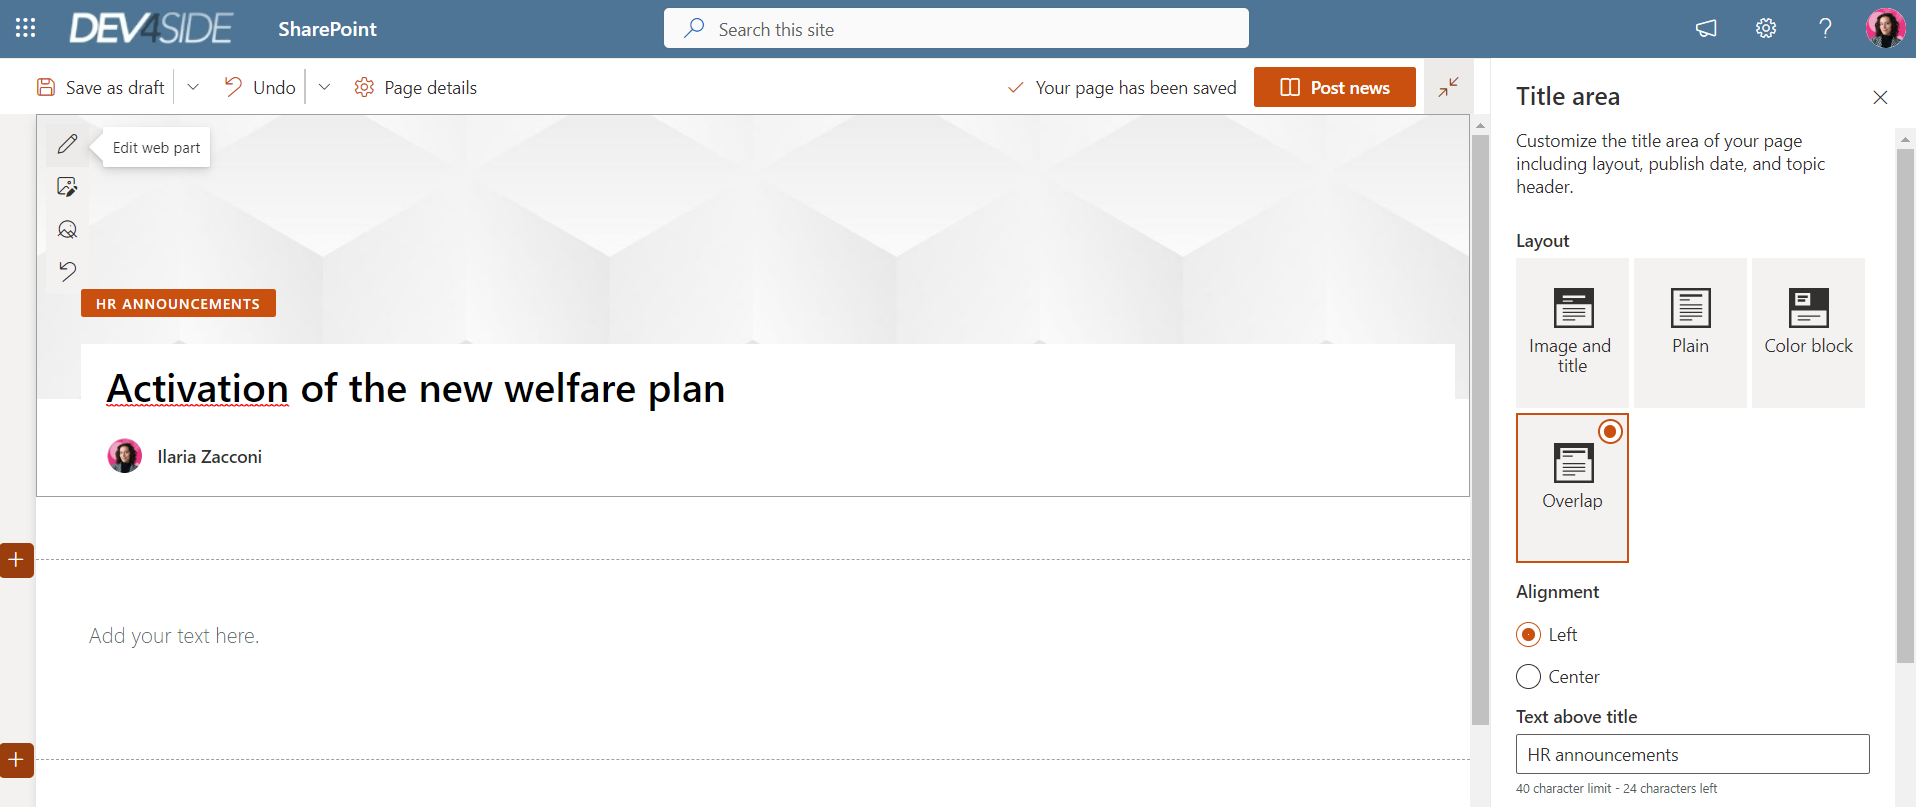
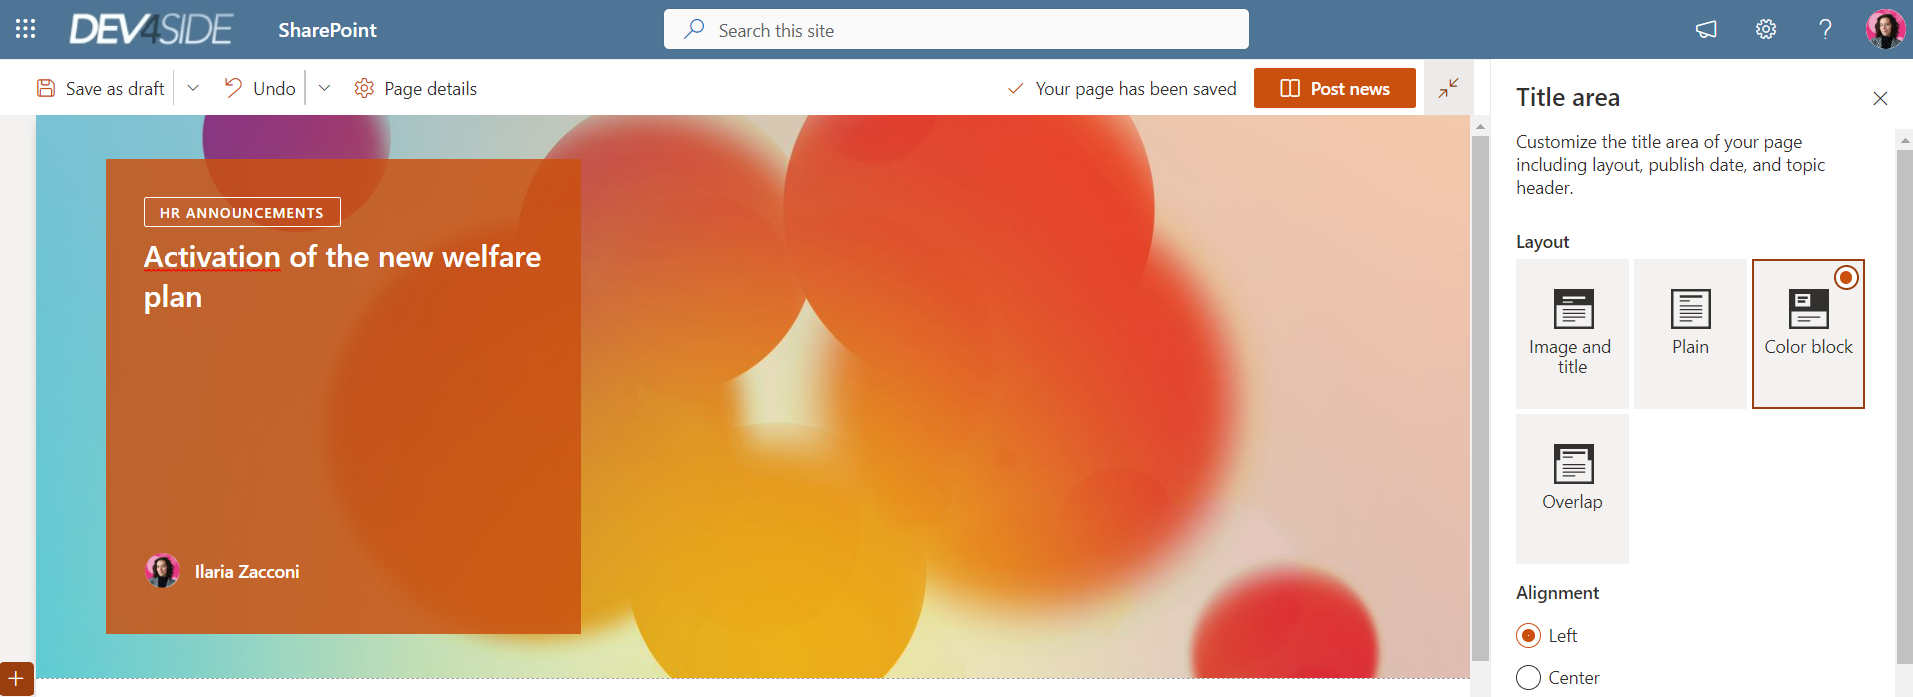
Step 4: The intriguing header
Accompany the title with an image that enhances the words.
Don't have design skills? No problem.
Click on "Edit Web Part" in the upper left corner (pencil icon) and choose a layout with an image included to catch the users' eye.
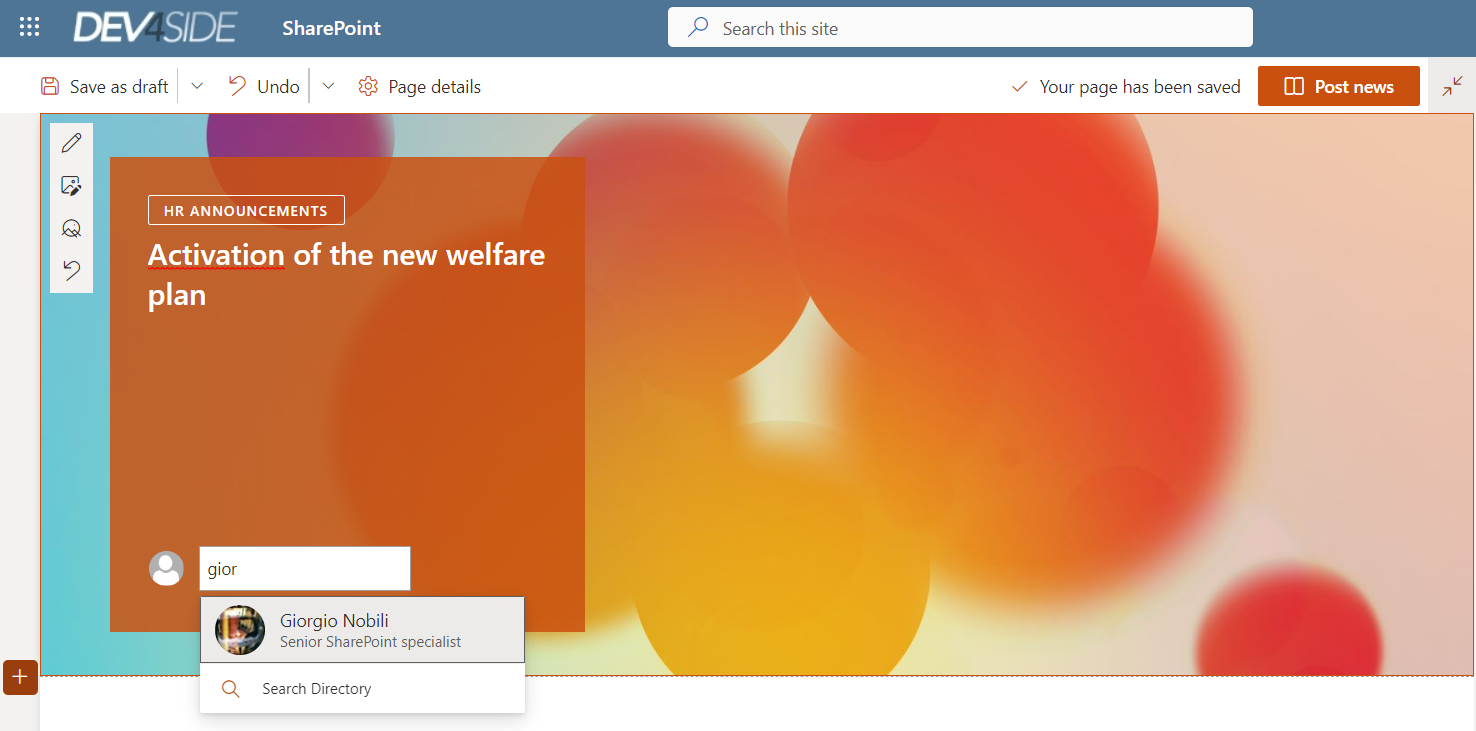
Step 5: The authoritative author
Pointing out the name of the author or author is important so that your article is not orphaned and so that readers will at least have a reference contact to turn to if needed.
SharePoint will by default indicate the username of the person who is writing the news, but you can always enter a different name in case you are publishing on behalf of others.
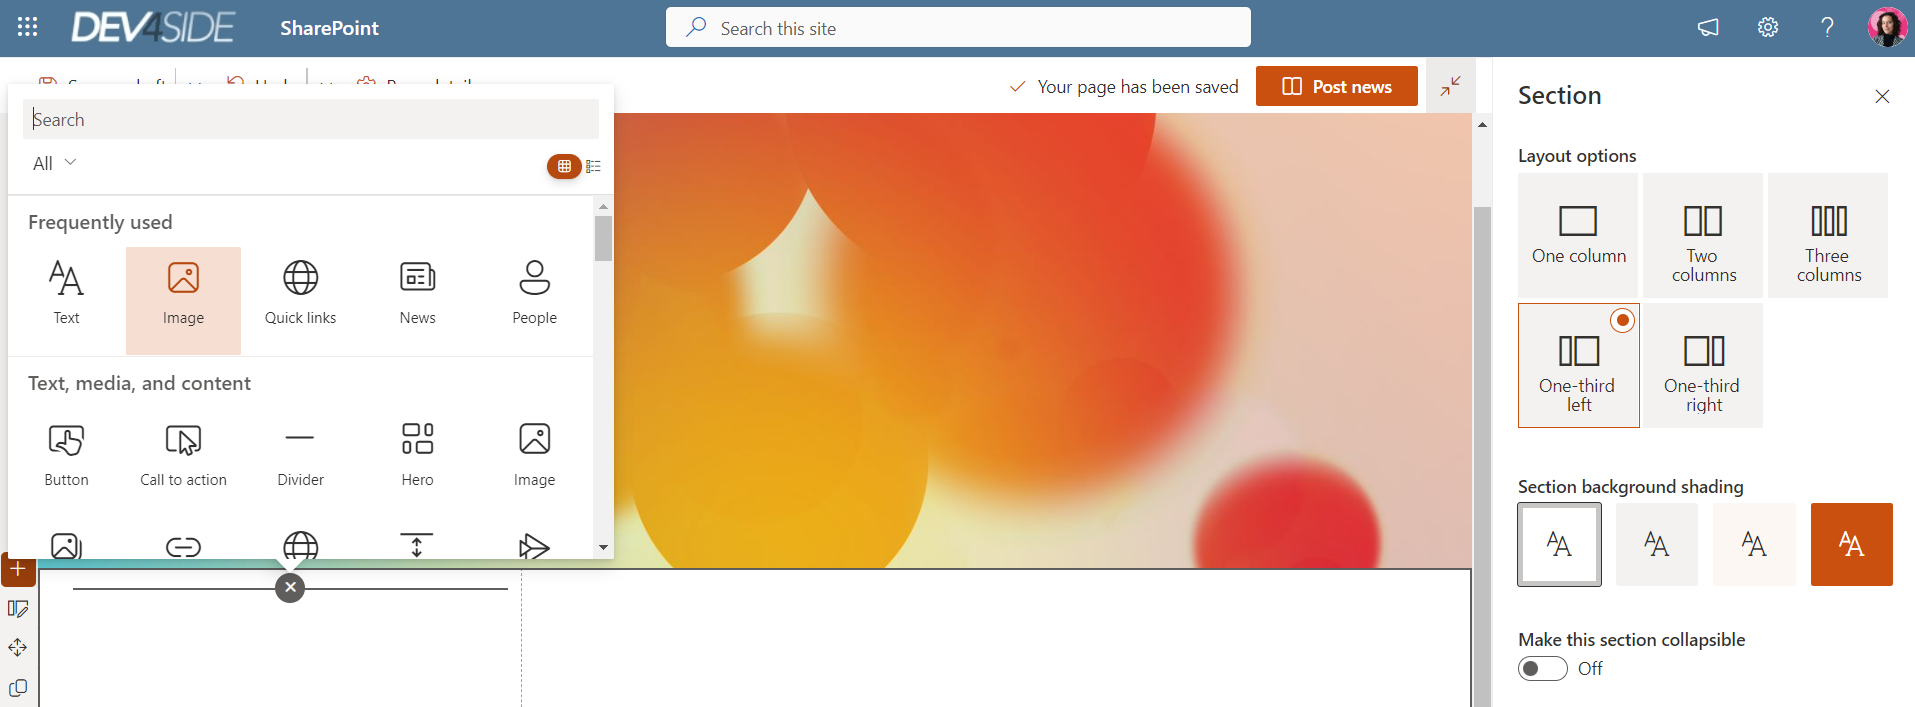
Step 6: The compelling content
Now it is time to work on the body of the text.
This is one of the most time-consuming steps, but it is also perhaps the most fun.
Here, in fact, you can take advantage of the web parts prepared by the platform to structure the news content. All of this, in a definitively intuitive way.
You can decide whether and how to divide the body of the article into columns, using templates to customize with text, images, infographics, carousels, videos and more.
In short, unleash your creativity.
Step 7: Valuable audience
Enable comments.
This may seem like a counterproductive move, but if you want to build truly engaging communication, you have to take the risk of giving readers a voice.
In fact, the real risk is to spend hours creating content that no eye or ear will appreciate.
So, click on the flag and leave open a dialogue channel that will allow you to provide a space for your audience to exchange ideas, questions and thus expand the discourse introduced by the article.
Remember that you will have a way to moderate this section, deleting the interventions that you deem most inappropriate.
Step 8: Postpone or publish?
If you are not ready to let the network know about your artwork, click on "Save as Draft".
If you want to reuse the news template you just created to brand upcoming communications, click "Save as Template".
If the time for reflections is up, click "Publish News" and let the intranet finish the job by telling all recipients that there is mail for them.
Step 9: The results achieved
Take a deep breath. Relax.
SharePoint will take care of collecting your communication performance data (likes, views, and shares) and notifying you when the comments come in.
Just remember not to wait until the next posting to respond!
Need help with your company newsletter?
We are ready!
- We create the blog for your intranet.
- We handle news and article writing following your corporate branding.
- We manage the migration of your content to SharePoint Online.
- We connect the intranet to your external publishing sites.
Giuseppe Marchi
Microsoft MVP for SharePoint and Microsoft 365 since 2010.
Giuseppe is the founder of intranet.ai and one of the leading experts in Italy in all matters related to Microsoft 365. For years, he has been assisting companies in creating their digital workplace environment on the Microsoft cloud, focusing on people's experience.

Keep on reading
SharePoint blog: How to set it up for the intranet

Here's how to set up sparkling news and article showcases with SharePoint.
Storytelling aziendale: come scrivere articoli che la intranet vorrà leggere

Want to write engaging articles for the intranet? Learn the art of storytelling.
SharePoint layout: Here's how to customize your intranet

How do you customize the layout of a SharePoint intranet? With our short guide.