

SharePoint Designer: How to use it for your SharePoint sites
SharePoint Designer is a legacy Microsoft application that helps design company websites based on SharePoint.
From customizing the layout to implementing automated flows, this tool is used to build comprehensive portals for communication and collaboration.
In this article, we’ll look at how to access SharePoint Designer, what features it offers, and how companies should manage the migration of their sites to SharePoint Online, despite its capabilities, to create a better user experience.
SharePoint Designer: What it is and how to access it
SharePoint Designer is a design tool developed by Microsoft for customizing SharePoint sites, but it is important to highlight that it can only be used in classic versions such as SharePoint 2010 and SharePoint 2013.
With the evolution of technology and the introduction of SharePoint Online, along with the modern Microsoft 365 suite, Designer has not been updated since 2013 and will reach end of extended support in 2026. So why are we still talking about this tool?
First of all, because understanding its features is useful to grasp the limitations of legacy versions of SharePoint, which are still the foundation of many internal portals, and to understand why organizations should consider migrating to more modern platforms to create their collaboration and communication sites, such as the corporate intranet.
SharePoint Designer, as the name suggests, is closely tied to SharePoint and is designed to help people build customized, data-rich sites without writing code. Despite being outdated, as we mentioned, it remains an important tool for those working in classic SharePoint environments, where Designer can provide specific features to automate organizational tasks and processes.
Its capabilities allow for customization of sites, from the layout to the individual components they consist of, with the ability to modify elements and relationships to design the user navigation. These capabilities are now better represented in tools such as Power Automate and Power Apps, which offer greater flexibility and are fully integrated with SharePoint Online.
Given the historical value and ongoing importance of Designer for organizations still using legacy SharePoint versions, we will explore some of the main features of this tool. We will also discuss how it is possible to migrate to the modern experience offered by SharePoint Online, for companies that are interested or that should be in making this change.

What is intranet.ai?
intranet.ai is the ready-to-use corporate intranet designed to cut implementation costs and time, and create a collaborative and modern digital work environment:
- From €3,950/year for a complete intranet
- 80+ applications, including advanced search, document management system, push notifications via Teams, organization chart, personnel profile and FAQ pages
- Integrated with SharePoint Online and Microsoft 365
How to connect a site to SharePoint Designer
SharePoint Designer is a legacy Microsoft tool used to customize SharePoint sites, compatible exclusively with the classic versions of the platform, such as SharePoint 2010 and 2013.
It is important to note that SharePoint Designer does not support the features of the modern SharePoint experience and has not received updates since 2013, with official support ending in 2026.
However, for organizations still using classic sites, this tool can be useful for managing layouts, components, and workflows. Let's see how to access it.
First of all, you need to have the correct permissions. Access to Designer requires that the user belongs to one of the following SharePoint groups:
- Site collection admin
- Owners
- Designers
These groups ensure the necessary permission levels for editing sites, allowing the organization to maintain control over changes and prevent unauthorized users from damaging navigation or internal portal components.
Once you have the required permissions, you can connect a site to SharePoint Designer by following these steps:
- Launch SharePoint Designer.
- Select "File" from the top menu of the interface.
- Choose the "Open Site" option.
- Enter your site URL in the "Site Name" box.
- Determine the editing mode, choosing whether to work directly on the site or create a copy to publish later.
- Confirm with "Ok".
At this point, you can use SharePoint Designer features to customize the site, working on navigation, components, and workflows, with the goal of optimizing the user experience and supporting business processes.
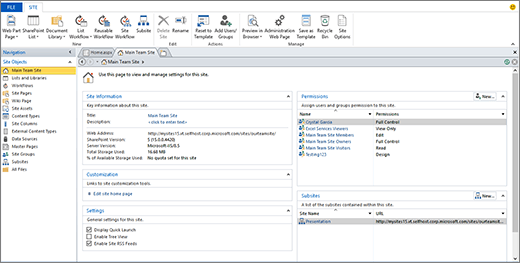
SharePoint Designer interface
However, we must always keep in mind that, with the evolution of the platform in SharePoint Online, more advanced tools such as Power Automate and Power Apps represent an excellent alternative to using Designer in terms of site customization and task automation.
Overall, migrating to SharePoint Online allows organizations to fully leverage the integration with the Microsoft 365 suite, offering significant advantages for companies that want to adopt the latest Microsoft technologies to improve the scalability, performance, management, and use of their sites.

Microsoft Power Automate interface
How to access SharePoint Designer features
As mentioned earlier, SharePoint Designer allows you to edit SharePoint sites in detail, as long as they are classic versions of the platform.
With its features, you can work on the layout to build customized pages aligned with the company's brand, influence how different page components interact to create automated workflows, or connect different data sources to the site and integrated apps, offering users a wide range of useful information for their tasks.
To access these features, SharePoint Designer must be enabled in the site settings. Admins can configure access through the site collection settings, possibly limiting the use of the tool to specific components, such as automations and custom lists. Also, connecting to the site requires an account with the appropriate permissions and, in the case of legacy SharePoint Online, authentication using Microsoft 365 credentials.
Once Designer is enabled and you log in, you are taken to the user interface, which is the starting point for becoming familiar with the tool’s features.
Here, you’ll find the command panes containing the main design features of the program, allowing you to navigate site components, edit them, and access relevant commands based on the selected elements.
Additionally, SharePoint Designer allows you to configure connections to Business Connectivity Services to view and edit data from external sources, such as SQL databases or ERP systems, consolidating them within SharePoint pages.
Besides creating custom pages, Designer allows you to configure workflows through Windows Workflow Foundation to automate tasks such as managing approvals or sending notifications to colleagues. While this feature is extremely useful on classic sites, it does not offer much flexibility in automation creation.
SharePoint Designer also allows you to work with HTML, XSLT, and CSS code to further customize a company site’s layout and components.
Finally, the ribbon allows you to connect various data sources directly to the site, such as external databases or REST services, enabling users to access aggregated information within a single portal page.
How to create automations with SharePoint Designer
Among the most appreciated design features of SharePoint Designer is the ability to create workflows to automate processes related to lists and libraries in a classic SharePoint site.
In particular, workflows created with SharePoint Designer can be used to automate two main types of processes:
- Processes related to site components: for example, you can automatically update an external data source whenever a document library is modified.
- Collaboration processes between people: for instance, you can send automated approval requests when a document is added to a specific list.
To create a workflow with SharePoint Designer, you need to:
- Open SharePoint Designer.
- Go to the "List Workflow" menu in the navigation bar.
- Select "New" and specify the site list that will trigger the workflow.
- Assign a name and a description to the new workflow.
- Make sure that "SharePoint 2013 Workflow" is selected under "Platform Type".
- Click "Ok" to start structuring the workflow.
A workflow in SharePoint Designer consists of five main components: Actions, Conditions, Stages, Steps, and Loops.
A condition might be the addition of a file to a list, while an associated action could be automatically sending an approval request.
The workflow runs to execute the assigned actions, which may be divided into subsequent stages and steps. Loops allow you to repeat certain tasks until a specific condition is met.
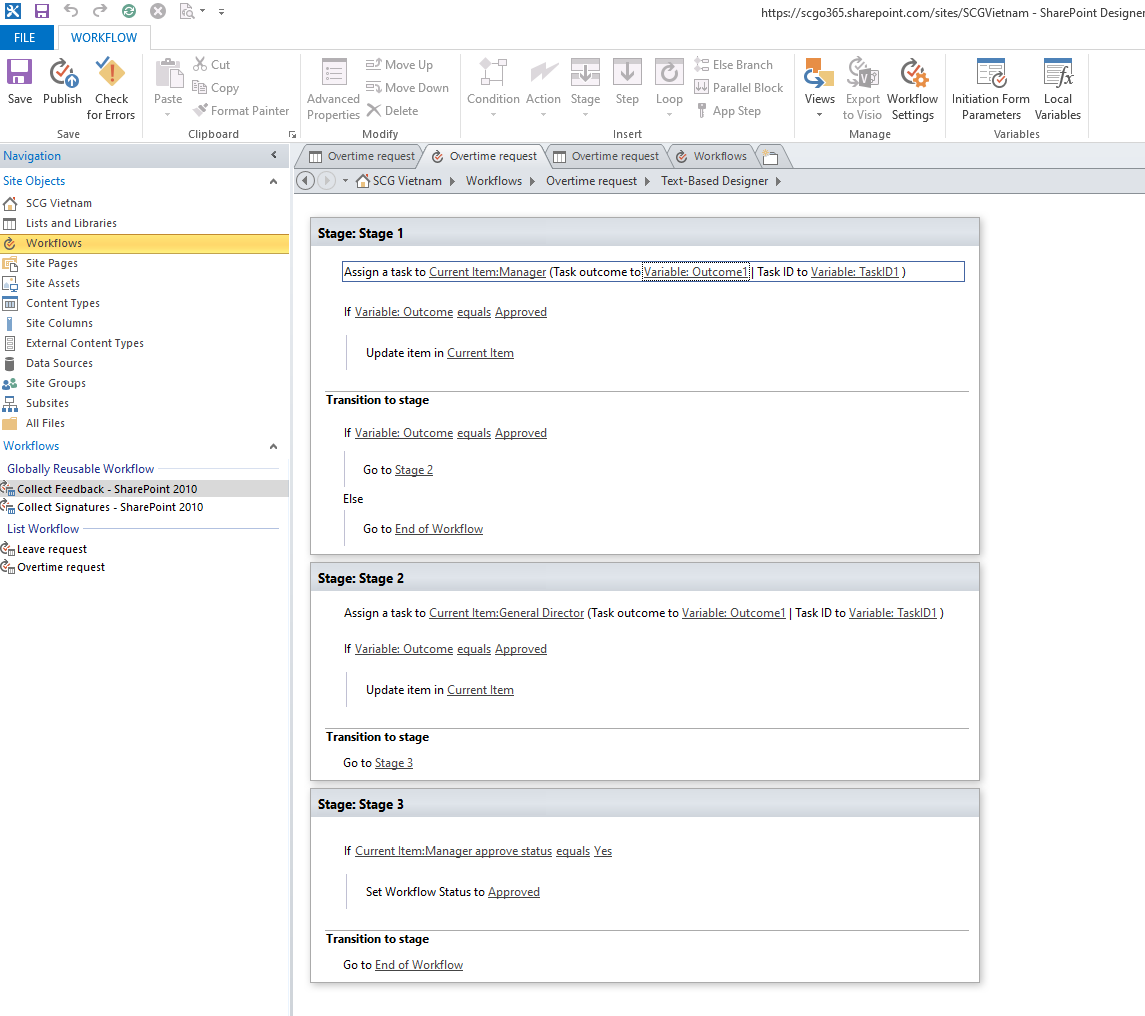
Creating an automation in SharePoint Designer
It is important to note that workflows created with SharePoint Designer are based on Windows Workflow Foundation, a technology that is now outdated along with the Designer platform itself. Today, the best solution to automate business processes is without a doubt Power Automate.
This tool allows the creation of flows compatible with SharePoint Online and all other applications within the Microsoft 365 business environment, without requiring advanced technical skills since it does not involve the use of code.
While Designer is limited to classic SharePoint sites and mainly offers automation for internal site processes, Power Automate expands automation capabilities across the entire Microsoft 365-based digital workplace.
With Power Automate, it is possible to integrate SharePoint with applications like Outlook and Teams, using predefined or custom connectors depending on the need. For example, we could create a flow that, whenever a document is uploaded to a SharePoint library, automatically sends a notification in a specific Microsoft Teams channel along with an email via Outlook to colleagues, including a direct link to the file and a request for review.
In addition, the flow could update the library used as an archive with details of the newly saved document, such as the file name, date, and the user who uploaded it, to track activities more efficiently.
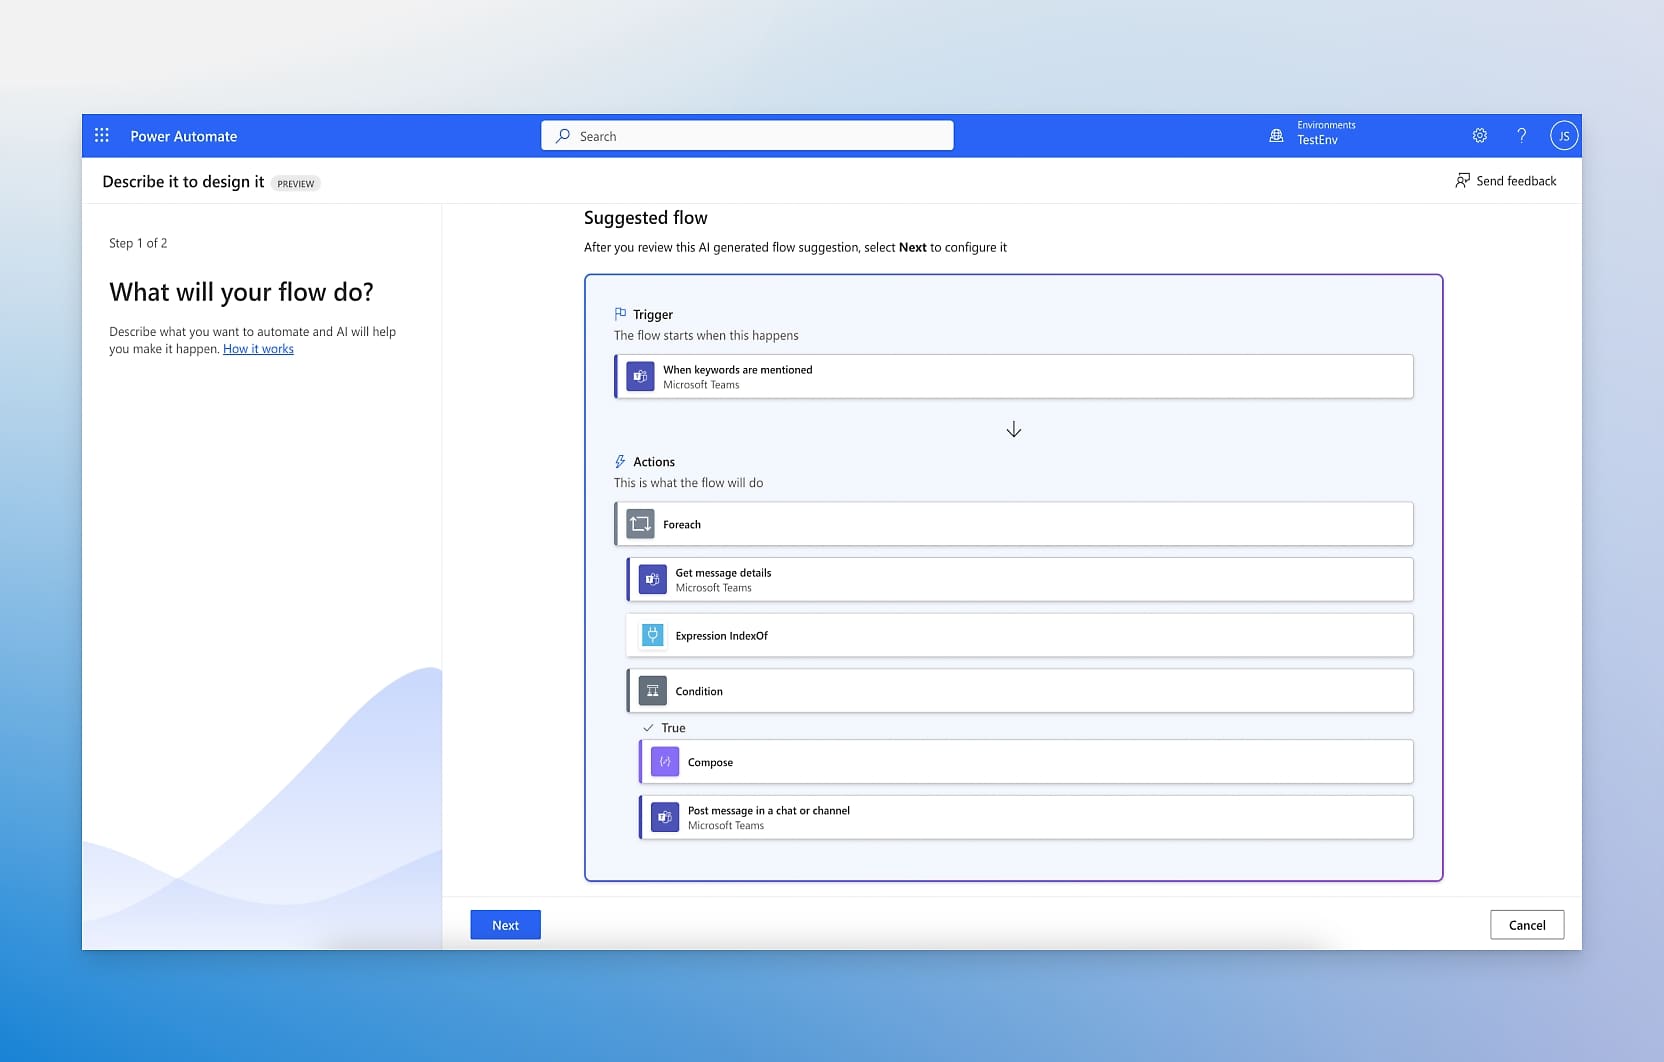
Creating an automation in Microsoft Power Automate
How to create custom sites with SharePoint Designer
An important feature of SharePoint Designer is its ability to support your organization’s branding strategy in classic SharePoint sites. In fact, this tool allows you to incorporate elements such as logo, color palette, corporate header and footer, creating a consistent and professional look for every page of the site.
SharePoint Designer provides three main tools to customize the layout of pages, each with a specific role in the design process:
-
Master page: originally introduced as an ASP.NET feature, master pages were designed to define the general layout and navigation of pages. They also allow you to create reusable templates, ensuring consistent appearance and structure across all pages in a site.
-
Page layout: used together with master pages, page layouts offer granular control over the structure of content on different pages of the site. Through layouts, you can configure the title, body, and graphical elements chosen by the company to build a page.
-
CSS style sheets: they allow you to customize colors, graphics, and the position of elements on site pages. With SharePoint Designer, you can create style sheets and associate them with master pages or page layouts, applying the brand’s visual identity consistently.
These tools, however, apply only to classic SharePoint sites. In modern sites, master pages and CSS are no longer supported, as Microsoft has adopted more scalable and secure approaches to building customized business sites. For example, the modern themes in SharePoint Online allow you to configure color palettes and styles centrally, without the need to modify the underlying site code.
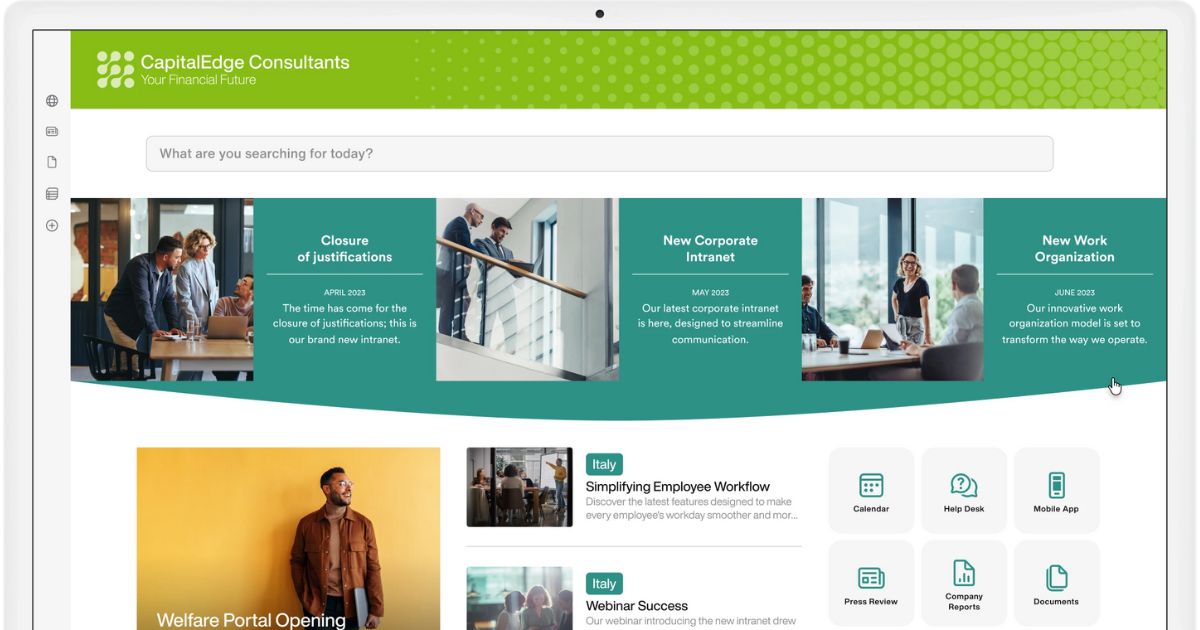
Custom theme for the SharePoint Online intranet by intranet.ai
Compared to SharePoint Designer, SharePoint Framework and Power Apps also offer more advanced customization options.
On the one hand, SPFx allows you to create custom web components and interactive solutions by leveraging modern development technologies such as TypeScript and React. On the other hand, Power Apps enables you to build business applications integrated with SharePoint Online and Microsoft 365, using a low-code approach and even starting from preconfigured templates.
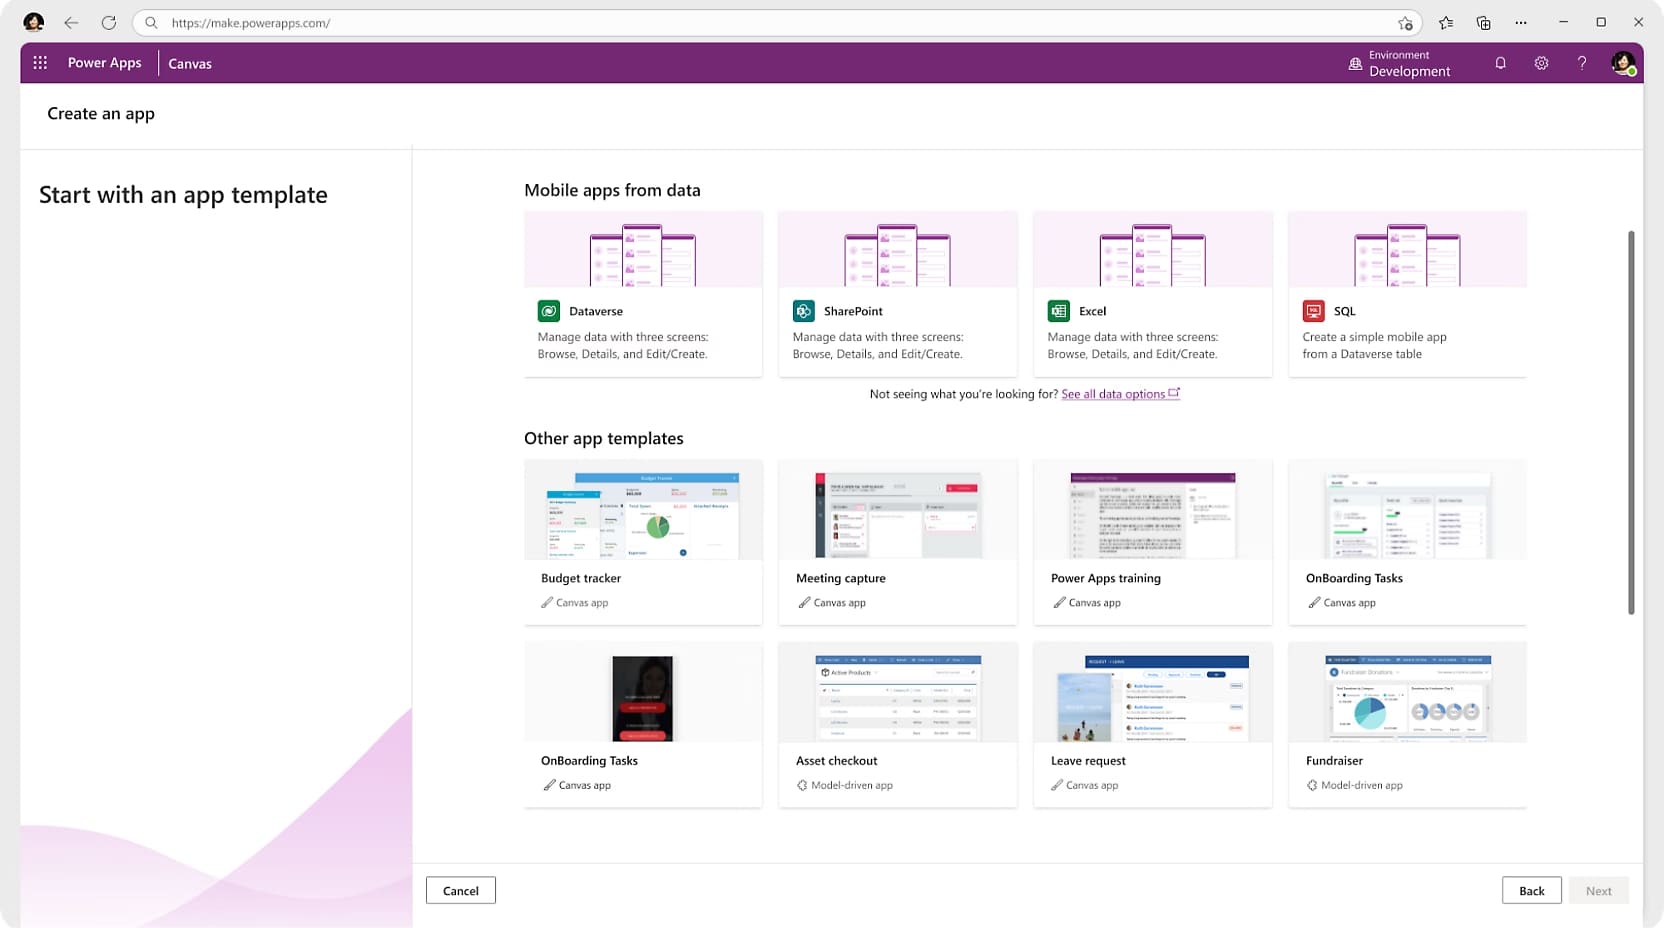
Creating an app with Microsoft Power Apps templates
SharePoint Designer: How and why to migrate to SharePoint Online
With the evolution of Microsoft technologies, many companies using SharePoint Designer are faced with a crucial choice: continue working with an outdated and unsupported tool or start the transition to a more modern and secure platform. That is, SharePoint Online.
There are many reasons to migrate, as we have seen in this brief overview.
First of all, SharePoint Designer has not received updates for years (to be precise, since 2013), which brings significant risks for data security, as well as major limitations in adopting the latest Microsoft technologies.
On the other hand, SharePoint Online is a constantly updated platform, with regular security patches and native integration with Microsoft 365, Microsoft Viva, and Microsoft Power Platform. The latter suite includes Power Automate and Power Apps which, as seen earlier, extend the automation and customization capabilities of SharePoint sites such as the company intranet, making it possible to digitize all internal processes.
Moreover, SharePoint Online goes beyond the customization limits typical of Master Pages and CSS files by offering modern solutions for creating graphics and layouts that align with the company brand. Among these, we highlight the ready-to-use themes that allow you to quickly build a site and then adapt it flexibly to users' needs.
Of course, productivity also benefits from the migration: SharePoint Online integrates seamlessly with other Microsoft applications, enhancing internal communication, collaboration, and the management of information shared daily within the company.
Lastly, the cloud-based nature of SharePoint Online ensures access to corporate content from anywhere and on any device, supporting mobile and remote workers.
SharePoint Designer: Is it really necessary to migrate to SharePoint Online?
Here is, in a few words, why companies should seriously consider migrating to SharePoint Online. But once the decision is made, how should it be done?
To migrate from a classic version of SharePoint to the modern SharePoint Online experience, it is important to pay attention to some key aspects by following these steps:
- Analyze the existing environment to identify content, customizations, and workflows that need to be transferred or adapted.
- Check the compatibility of customizations by ensuring that elements such as Master Pages, legacy workflows, or custom layouts can be updated or replaced.
- Define the migration strategy by planning which content and features to transfer based on business priorities.
- Use appropriate migration tools such as Microsoft’s Migration Manager, which can help securely move data, libraries, and lists.
- Engage key users to ensure the new SharePoint environment meets the needs of various teams and departments.
- Train end users with training sessions designed to help them get familiar with the new interface and features offered by SharePoint Online.
Relying on SharePoint and Microsoft 365 experts, such as the intranet.ai team, can make a real difference.
We can not only ensure a safe and seamless migration, but we are also able to help companies implement a Microsoft 365-based digital workplace tailored to their needs. At the heart of our approach and the digital workplaces we create is always our ready-to-use intranet, designed to enhance collaboration and efficiency by offering a centralized access point to tools, content, and business processes.
With the support of our consultants, migrating to SharePoint Online becomes more than just a technological change. It becomes a real opportunity for innovation, transforming the way companies work, communicate, and evolve.
Do you want a complete, ready-to-use intranet?
intranet.ai is the SharePoint Online-based solution for simplifying internal communication and digitizing business processes with minimal investment of time and money.
- 80+ features for communication and employee experience
- Branded design, customizable in every detail
- Full integration with Microsoft 365 and Viva
Giuseppe Marchi
Microsoft MVP for SharePoint and Microsoft 365 since 2010.
Giuseppe is the founder of intranet.ai and one of the top experts in Italy for all things Microsoft 365. For years, he has been helping companies build their digital workspace on Microsoft's cloud, curating the people experience.
He organizes monthly online events to update customers on what's new in Microsoft 365 and help them get the most out of their digital workplace.

FAQ about SharePoint Designer
What is SharePoint Designer?
SharePoint Designer is a design program developed by Microsoft to create and customize SharePoint sites and web applications. It allows users to modify layouts, workflows, and content without the need to write complex code.
How can I start using SharePoint Designer?
To start using SharePoint Designer, you need to download the program and install it on your computer. Once it is set up, you can connect to a SharePoint site to edit and customize it according to your needs.
How do I connect a SharePoint site to SharePoint Designer?
To connect a SharePoint site to SharePoint Designer, simply open the program, select the "Open Site" option, enter the desired site URL, and confirm. It is important to have administrator or designer permissions to make changes.
What are the main features of SharePoint Designer?
SharePoint Designer allows you to customize site layouts, create workflows to automate business processes, integrate external applications, and manage data sources to improve the user experience.
How can I create automated workflows with SharePoint Designer?
To create a workflow, just open the site in SharePoint Designer, go to the "Workflows" section, create a new workflow, and configure the desired actions. Once saved and published, the workflow will automatically handle the specified tasks.
Can I customize the appearance of SharePoint sites with SharePoint Designer?
SharePoint Designer allows you to customize the appearance of sites by modifying the layout, colors, and other graphic elements. You can work on master pages and layout pages to ensure a design that is consistent with the company's visual identity.
Keep on reading
SharePoint Templates: Examples and How to Enhance Your Brand

Let’s see what SharePoint Online templates are and how to use them to quickly create modern company sites such as the HR portal or the intranet.
How to Create a SharePoint Intranet Site

Our experts share tips, considerations, and steps to follow to create a smart intranet site with Microsoft SharePoint.
SharePoint Workflows: 3 examples to automate SharePoint lists

Let’s see how to automate SharePoint lists and libraries, with 3 use cases of Power Automate that also involve Forms, Outlook and Approvals.